Macerating Toilet vs. Standard Rough-In: Basement Bathroom Plumbing Explained
Adding a bathroom below grade comes down to one decision most homeowners have never heard of until they start pricing the project: how the waste gets out. Basement bathroom plumbing works against gravity, because your fixtures sit below the sewer line that leaves the house. There are two proven ways to solve that in a St. Louis home, a macerating (upflush) toilet system or a standard rough-in with an ejector pump, and the right choice depends on your slab, your budget, and how you plan to use the space. This guide walks you through the decision step by step, the way a contractor would at your kitchen table.
Step 1: Find Out Where Your Main Drain Line Sits
Before you compare toilets or pumps, locate the main sewer line where it exits the house. This one fact decides whether you even need a pump.
In many St. Louis homes, especially older brick foundations in neighborhoods with deep sewer laterals, the main drain exits below the basement slab. If that is your house, gravity may do the work, and you can tie a new bathroom into the existing line with a standard rough-in and no pump at all.
However, most basements are not that lucky. If the drain exits at or above slab level, waste from a basement toilet has to be lifted before it can leave the house. That means either an ejector pump under the slab or a macerating unit above it.
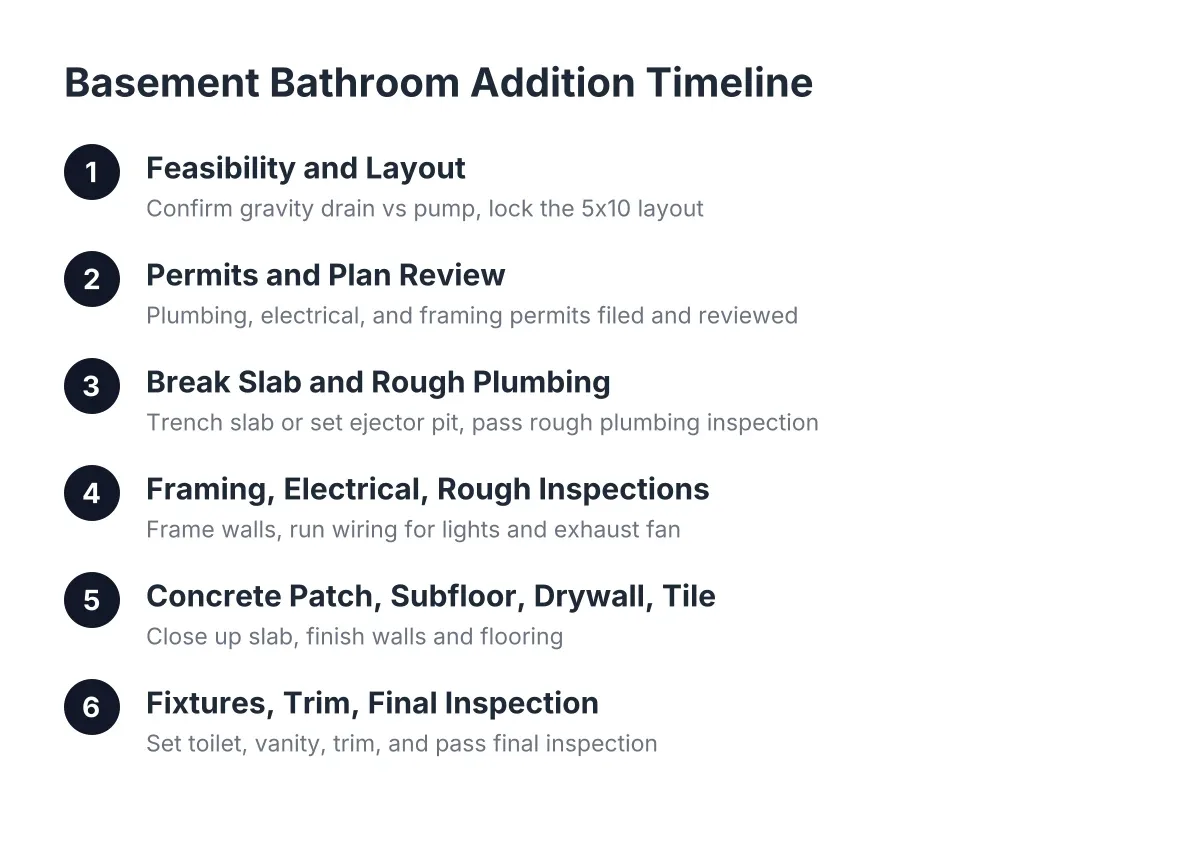
A contractor can usually confirm this in a single visit by finding the cleanout, checking the stack, and measuring the exit height. Some homes also have an existing rough-in, capped pipes sticking up through the slab, left by the original builder. If you see three capped stubs in a cluster on your basement floor, a good portion of the plumbing decision has already been made for you.
Step 2: Understand Your Basement Plumbing Options
Both systems get waste up and out. They differ in how much concrete you break, what the finished bathroom looks like, and what maintenance you sign up for.
Standard rough-in with a sewage ejector pump
This is the traditional approach and the one most people picture when they think of adding a bathroom to a basement. The crew saw-cuts and breaks out a section of the slab, trenches drain lines that slope to a sealed pit called an ejector basin, and sets a sewage ejector pump in that basin. The pump grinds nothing; it simply lifts waste up to the main drain line, where gravity takes over.
The payoff is a bathroom that looks and works exactly like the ones upstairs. Standard toilet, standard shower drain in the floor, nothing bolted to the wall behind the fixtures. The basement bathroom plumbing rough-in gets inspected before the concrete goes back, so everything is documented and permanent.
Macerating (upflush) toilet system
A macerating system flips the problem. Instead of putting the drains below the floor, it puts a grinding pump behind the toilet, above the slab. The unit macerates waste and pumps it through a small-diameter pipe, often 3/4 inch to 1 inch, up and over to the existing drain stack. A sink and shower can tie into the same unit, though the shower usually sits on a raised platform so its drain can reach the macerator.
The big draw is basement bathroom plumbing without breaking concrete. No saw-cutting, no jackhammer dust, no trench through your slab. That matters if your basement is already partially finished, if the slab has radiant heat, or if breaking concrete near an old foundation makes you nervous.
Step 3: Compare the Trade-Offs Honestly
Neither option wins on every measure. Here is how they stack up on the things homeowners actually ask about.
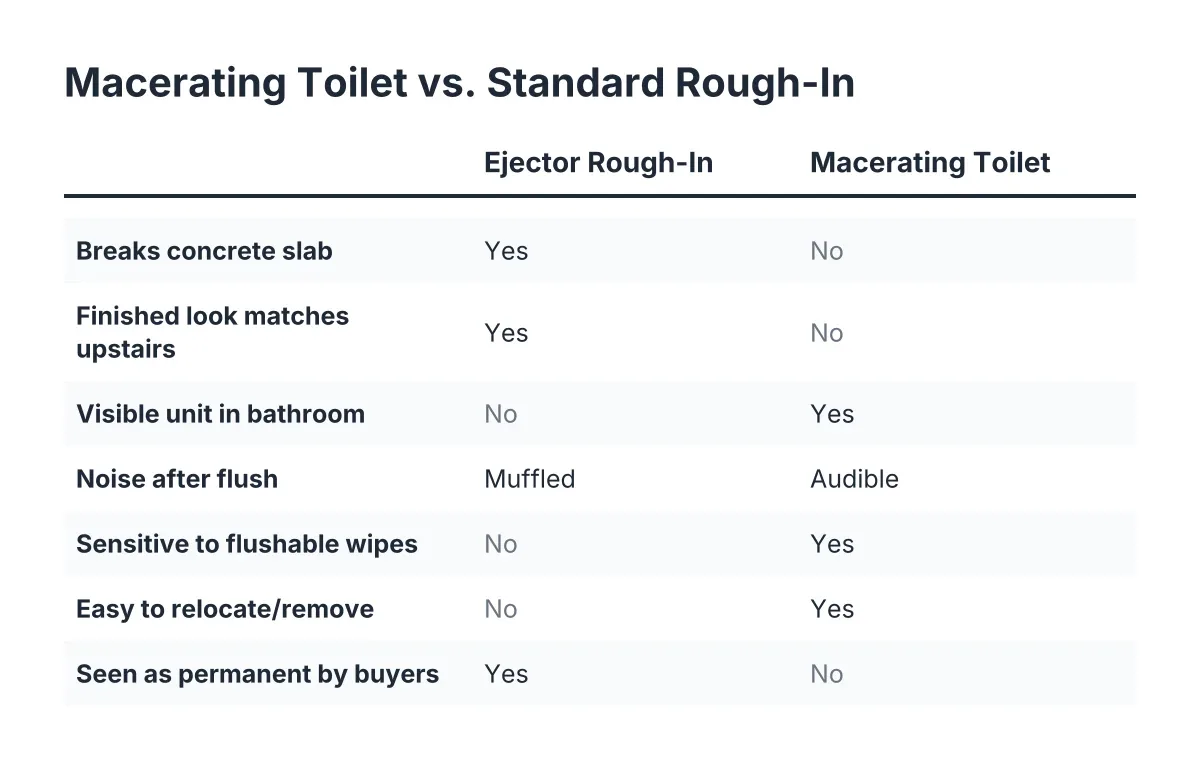
- Disruption during construction. The ejector route means several days of concrete cutting, trenching, and re-pour. Macerating systems install above the floor with far less mess and noise.
- Finished look. An ejector setup gives you a bathroom indistinguishable from upstairs. A macerating toilet has a visible unit behind or beside the bowl, and the shower typically sits a step up.
- Long-term durability. Ejector pumps are workhorses sized for a full bathroom and sit out of sight in a sealed basin. Macerating units have more moving parts in the living space and are more sensitive to what goes down the toilet; flushable wipes are a common cause of service calls.
- Noise. A macerator runs briefly after each flush and you will hear it. An ejector pump cycles under the slab and is muffled by the basin lid and concrete.
- Resale perception. Buyers and home inspectors in the St. Louis market generally view a permitted, slab-trenched bathroom as a permanent improvement. Macerating systems are code-legal when installed correctly, but some buyers see them as a workaround.
- Reversibility. A macerating bathroom can be relocated or removed with modest effort. Trenched drain lines are where they are.
For example, suppose a homeowner in Kirkwood wants a full bath next to a planned basement bar so guests never trek upstairs during a watch party. The slab is bare, the layout is flexible, and the family plans to stay ten years. In that scenario, the ejector rough-in usually makes more sense; the disruption happens once, before the basement finishing work starts, and the result reads as a real bathroom. Flip the details, say the basement is already carpeted and the bathroom is mostly for occasional overnight guests, and the macerating system starts looking like the smarter trade.
Step 4: Understand Plumbing Costs Before Choosing Finishes
Basement bathroom plumbing cost is driven by scope, not fixtures. Understand what moves the number before you fall in love with a vanity.
The main cost factors for the ejector route are how much slab gets opened, how far the new drains run to reach the stack, whether a vent can tie into an existing vent line or needs a new path up through the house, and the pump and basin themselves. Water supply lines are the easy part; it is the drain, waste, and vent work that sets the price.
For a macerating system, the unit itself carries much of the cost, and installation labor drops because there is no concrete work. However, you may spend some of those savings on the raised shower platform and on framing to conceal the discharge piping.
In addition, remember that plumbing is only one line item in the total basement bathroom remodel cost. Framing, electrical, ventilation fan, drywall, waterproof flooring, and fixtures all stack on top. A basement bathroom addition often gets built alongside a larger basement finishing project, and bundling the work usually costs less than adding the bathroom later, because the walls are already open and the crew is already on site. As of 2026, a realistic full-bath budget in the St. Louis market lands as a meaningful slice of a typical $10k to $35k basement project, which is why nailing down the plumbing approach early keeps the rest of the budget honest. Treat any figure you see online, including small bathroom remodel cost averages written for above-grade baths, as a starting point, not a quote for below-grade work.
Step 5: Sort Out Permits, Venting, and Inspection
Yes, you need a permit. Adding a bathroom in St. Louis, whether city or county, involves plumbing and electrical work that requires permits and inspections, and that is true for both ejector and macerating installations.
This is where below-grade bathrooms trip up generalist remodelers. Every fixture needs proper venting, and venting a basement bathroom means finding a path for air, either by tying into an existing vent stack or, where code allows, using an air admittance valve for certain fixtures. Ejector basins need their own vent as well. An inspector will check the rough-in, the venting, and the slope of every drain line before anything gets covered.
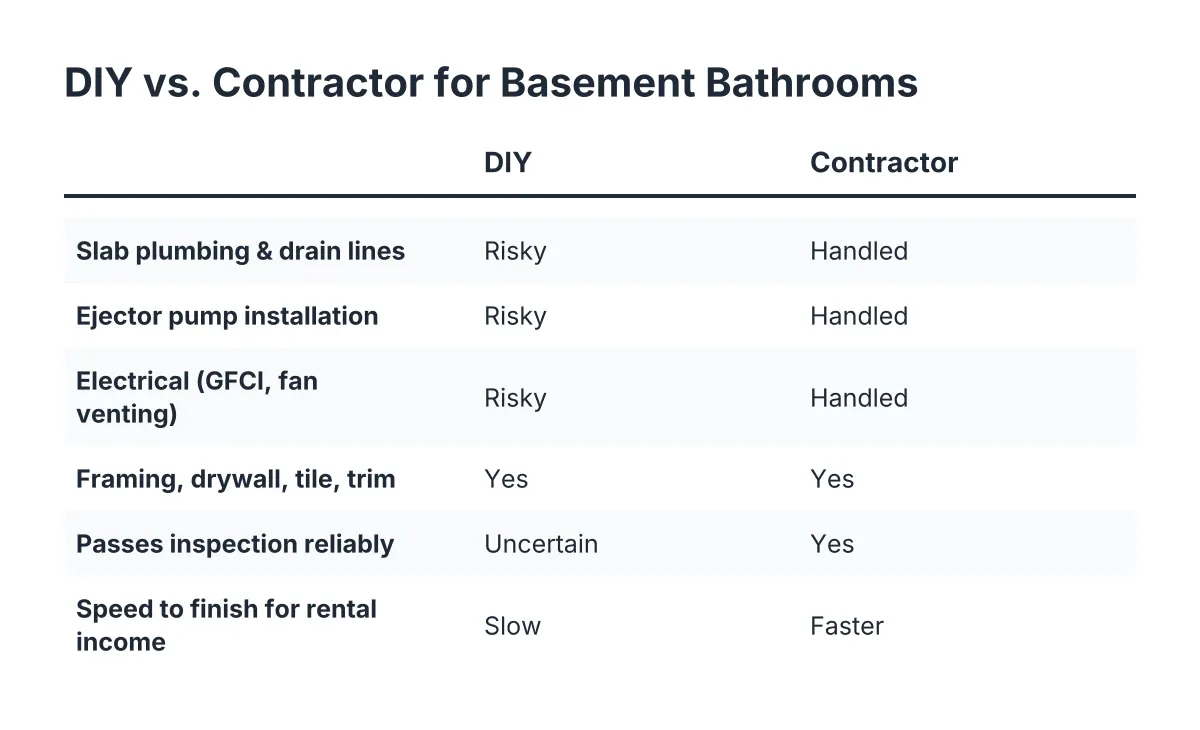
Do not skip this step to save time. An unpermitted basement bathroom can stall a home sale, void insurance claims, and force you to open finished walls later. A local contractor who does basement work weekly will know which municipality you pull the permit from and what that inspector expects to see, which varies more across St. Louis area municipalities than most homeowners realize.
Step 6: Plan the Layout Around the Plumbing, Not Against It
Once you know your system, let it shape the floor plan. Fighting the plumbing is the most expensive layout mistake in basement work.
First, put the bathroom as close to the main stack or existing rough-in as the design allows. Every extra foot of trench or discharge pipe adds cost and complexity. Next, check ceiling height where the shower will go; a macerating setup's raised platform can eat 6 to 8 inches, which matters under low joists or ductwork.
Also coordinate the bathroom with everything else happening below grade. If a load-bearing wall assessment is part of your basement remodeling plan, or you are choosing between carpet and hardwood over a plywood subfloor, sequence the plumbing rough-in first. Concrete work before subfloor, always.
One honest caveat: if your basement has active water intrusion or foundation movement, solve that before adding any bathroom. No pump or macerator fixes a wet basement, and reputable contractors will tell you to address the root cause first.
The Bottom Line
If you want a permanent, upstairs-quality bathroom and your slab is open, the standard rough-in with an ejector pump is usually worth the concrete work. If you need a functional bath with minimal disruption, or the slab cannot be broken, a macerating system gets you there faster and cheaper. Either way, start by confirming your drain height, budget the plumbing before the finishes, and pull the permit. Get those three things right and the rest of the project, the tile, the vanity, the bar on the other side of the wall, becomes the fun part.
If you need basement finishing, STL Basement Finishing can help.
Prefer to talk it through? Call (314) 916-6297 — a quick call is usually the fastest way to get a straight answer for your situation.