Basement Bathroom Waterproofing: Preventing Moisture and Mold Before You Build
If you are adding a bathroom below grade in St. Louis, the plumbing and the permit are only half the job. The other half is basement bathroom waterproofing, preventing moisture and mold problems before they start, because a bathroom puts warm, humid air and daily water use into the one room of your house that is already fighting ground moisture from every direction. Get the moisture details right during rough-in and framing, and your basement bathroom will hold up like any other room in the house. Get them wrong, and you can end up with musty smells, swollen trim, and mold behind the walls within a few years, often with no visible leak to point at.
This guide is written for the homeowner who has already decided to add the bathroom and wants to do it the legal way, with the right materials in the right order. It covers where basement moisture actually comes from, the wall and floor assemblies that handle it, how waterproofing work intersects with permits and inspections in St. Louis, and the specific decisions you or your contractor need to make before drywall goes up.
Why a Basement Bathroom Is a Different Moisture Problem
A bathroom on the main floor deals with moisture from one direction: the inside. Showers, sinks, and toilets generate humidity, and a fan pushes it outside. A basement bathroom deals with moisture from two directions at once, and that changes how you build it.
First, there is the moisture you create. A hot shower in a small below-grade room loads the air with water vapor fast, and basements are naturally cooler, so that vapor condenses on cold surfaces sooner than it would upstairs.
Second, there is the moisture already pushing in from outside. Concrete foundation walls and slabs are porous. Soil moisture migrates through them as vapor, driven by pressure differences, even when the basement looks bone dry. Treatments that only address the symptoms, like painting over a damp spot, tend to fail because that vapor migration keeps working underneath them.
The trap most homeowners fall into is thinking of waterproofing as one product, usually a coating or a membrane, instead of as an assembly. A basement bathroom that stays dry for decades is the result of several unglamorous decisions stacking up correctly: what touches the concrete, what goes in the wall cavity, what the floor sits on, and where the humid air goes. The sections below walk through each one.
Rule One: Fix Water Intrusion Before Any Finishing Starts
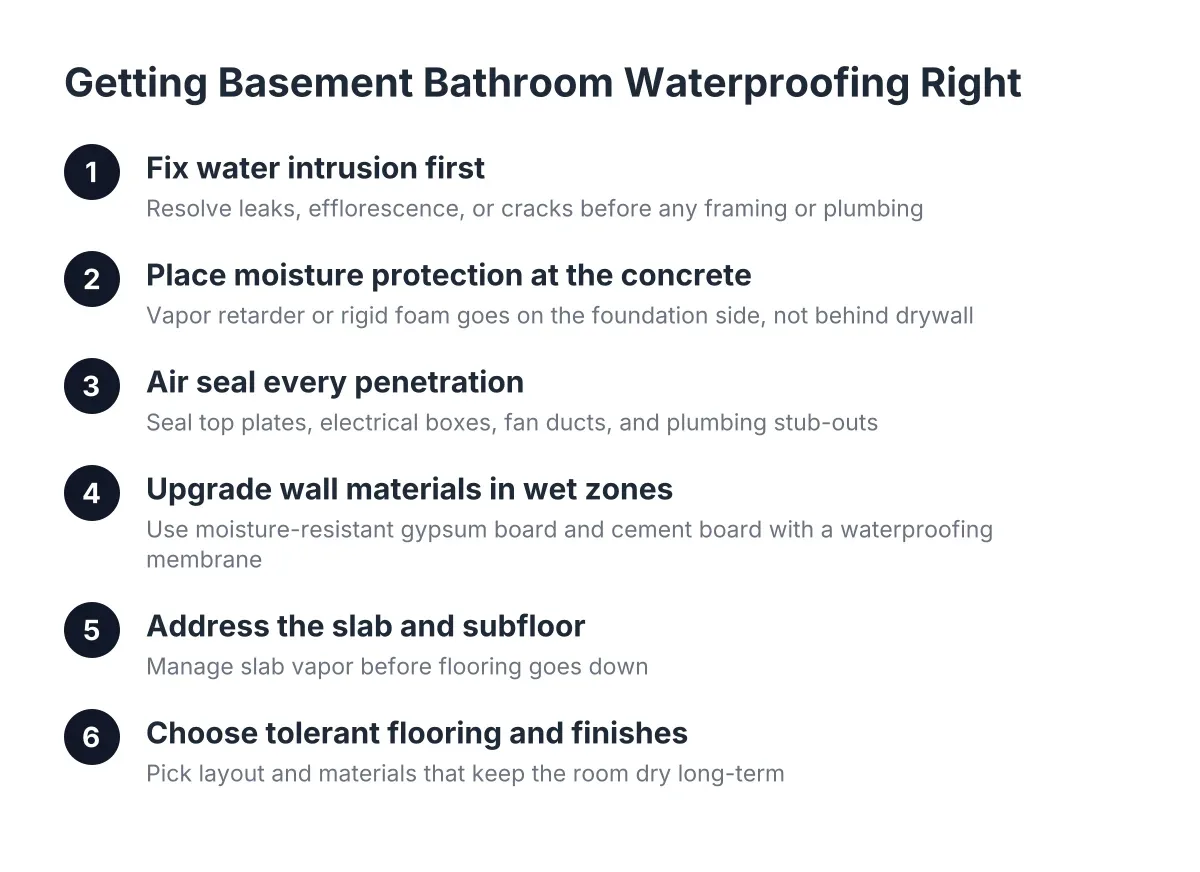
No wall assembly, subfloor, or paint can compensate for active water intrusion. If your basement takes on water during heavy rain, shows efflorescence (the white chalky mineral deposits on concrete), or has a crack that weeps, that problem gets solved first, before framing, before plumbing rough-in, before anything.
This is the point where an honest contractor may tell you something you do not want to hear. Insulating and finishing over an unresolved moisture problem does not hide it; it accelerates it, because the wet materials can no longer dry and the damage happens out of sight. A basement with recurring water intrusion or foundation movement needs a foundation or drainage specialist before a finishing contractor, and that is a professional call, not a judgment you should make from a weekend inspection.
For most St. Louis basements, though, the picture is less dramatic. The slab and walls are structurally sound and visibly dry, and the real work is managing the vapor that moves through sound concrete every day. That is where assembly choices matter.
Waterproofing Strategies for Your Basement Bathroom Walls
The walls around a basement bathroom have to solve two problems at the same time. They must stop warm, humid interior air from reaching the cold concrete, where it would condense. They must also keep soil moisture wicking through the foundation from soaking into the framing and drywall. A correct assembly handles both and still lets the cavity dry out if it ever does get wet.
Where the vapor barrier goes, and where it absolutely should not
Here is the mistake that causes more finished-basement mold than any other: putting a plastic vapor barrier on the interior side of the stud wall, directly behind the drywall, the way you might in an above-grade wall in a cold climate. In a basement, that sheet traps moisture inside the cavity. Water that enters through air leaks, capillary wicking from the slab, or a minor plumbing drip has nowhere to dry, so it sits in the insulation and framing and feeds mold.
The correct layout puts moisture protection against the concrete, not against the drywall. A vapor retarder or rigid foam insulation goes on the foundation side, keeping interior air off the cold concrete and ground moisture out of the cavity. The interior side gets an air-sealed finish, but one that allows drying toward the room. Homeowners often assume any vapor barrier helps; in the wrong location, it is the single fastest way to ruin a framed basement wall.
Air sealing matters more than the materials
Vapor diffusion through drywall is slow. Air leakage is not. A small gap at the top plate or around an electrical box can carry far more moisture into a wall cavity than the entire surface of the drywall passes through in a year. Therefore, the detail work matters: sealed penetrations, gaskets or caulk at plates, and tight boxes around the bathroom fan duct and plumbing stub-outs.
For the bathroom itself, this is also where material upgrades pay off. Paperless or moisture-resistant gypsum board (the purple board you see at supply houses) resists moisture and mildew far better than standard drywall, and in a below-grade wet room the cost difference is small relative to the project. Inside the shower or tub surround, standard practice in 2026 is cement board with a dedicated waterproofing membrane, either sheet-applied or liquid-applied, behind the tile. Drywall of any color does not belong inside a wet zone.
The Floor: Slab Vapor, Subfloors, and Why They Matter Under a Bathroom
The slab under your basement bathroom is sitting on soil, and moisture moves up through it just as it moves through the walls. Newer homes usually have a plastic vapor barrier under the slab; according to W. R. Meadows, a vapor barrier placed over the base course under a concrete slab blocks moisture transmission from the ground into the concrete above. Many older St. Louis homes have no such barrier, which means the slab itself breathes ground moisture into the room year-round.
Either way, finishing directly on bare concrete is a gamble under a bathroom. A better approach is a subfloor system: dimpled membrane panels or a plywood subfloor over a dimpled underlayment, raised slightly off the slab. The air gap lets vapor under the floor migrate toward drier zones and escape instead of accumulating under your flooring. Even a basement with an existing under-slab vapor barrier benefits from a subfloor, because it also protects the finished floor from future moisture events like a water heater failure or a backed-up drain.
Around the bathroom specifically, the subfloor decision interacts with plumbing. Breaking the slab for the drain lines, or setting an ejector pump basin, disturbs whatever vapor barrier exists. The patch-back work needs to restore that layer, and the transition between the new concrete and the subfloor panels needs to be planned, not improvised after the fact.
Choosing flooring that tolerates the room
Inside the bathroom, skip carpet and solid hardwood entirely. Porcelain tile or a quality vinyl plank handles the humidity and the occasional splash without complaint. Outside the bathroom door, in the bar or media area, the carpet-versus-hardwood question is a comfort and budget decision, but it should always sit on a subfloor, not on bare slab.
How Waterproofing Fits Into Permits and Inspections in St. Louis
If you are the type of homeowner who loses sleep over whether the work is legal, here is the reassuring part: the permit and inspection process is actually your ally on moisture. Inspections force the assembly to be looked at while it is still open.
A basement bathroom addition in St. Louis involves plumbing, electrical, and building work, and that means permits. The specific requirements differ between the City of St. Louis and the municipalities in St. Louis County, which is why advice you find on national forums often contradicts what your local inspector expects. Do not try to reconcile the internet; have your contractor confirm requirements with the jurisdiction your house actually sits in, in writing, before work starts.
The inspection sequence works in your favor on waterproofing because the inspector sees the work before it is covered:
- Plumbing rough-in inspection. The under-slab drain lines, ejector basin if one is required, and venting get checked before the slab is patched back. This is also the moment to confirm the slab vapor barrier is restored at the patch.
- Framing and insulation inspection. The wall assembly is visible. An inspector catches an interior-side plastic sheet or missing fireblocking while it still costs nothing to fix.
- Electrical rough-in. Bathroom circuits, GFCI protection, and the exhaust fan wiring get verified. Wiring method matters in a basement: according to the National Electrical Code (NFPA 70), running non-metallic sheathed cable inside EMT conduit is against code in damp or wet locations, so exposed runs in unfinished areas need the right method, not the convenient one.
- Final inspection. Fixtures, the fan ducted to the exterior (never into a joist bay), and finished surfaces get signed off.
Be wary of any contractor who says a basement bathroom "doesn't usually need a permit." Concealed plumbing and electrical work in a below-grade wet room is exactly what permits exist for. Unpermitted bathrooms also surface at the worst time: when a buyer's inspector or your realtor asks whether the basement finish was permitted, and you have no paper trail. The permit cost and the inspection visits are cheap insurance compared to reopening finished walls later.
A Walkthrough: What Doing It Right Looks Like
Suppose a homeowner in Kirkwood is adding a 5-by-9 bathroom to an unfinished basement as part of a larger basement bar and media room project, with a budget in the $25,000 to $35,000 range for the whole lower level. Here is roughly how the moisture-critical steps would sequence in that scenario.
First, the contractor checks the basement in its raw state: looks for efflorescence, checks the slab around the floor drain, and asks about water history during heavy spring rains. The basement is dry, so finishing can proceed. Next, the slab gets cut for the drain lines and an ejector basin, since the fixtures sit below the sewer line. After the plumbing rough-in inspection passes, the crew patches the slab and restores the vapor barrier at the cut.
Framing follows, with rigid foam against the foundation walls, sealed top and bottom plates, and no plastic sheeting behind the drywall plane. The bathroom gets purple board on the walls, cement board with a waterproofing membrane in the shower surround, and a fan ducted outside. The floor outside the wet zone gets a plywood subfloor over a dimpled underlayment so the whole lower level can breathe toward drier zones. Every stage gets inspected before it is covered. Nothing about that sequence is exotic; it is just the steps done in the right order with nothing skipped.
Layout and Finish Choices That Keep the Room Dry
Waterproofing is mostly hidden in the assembly, but a few visible design decisions affect how much moisture the room generates and how well it sheds it.
- Keep the wet zone compact. Small bathroom designs with shower and toilet along one plumbing wall shorten drain runs, reduce slab cutting, and concentrate waterproofing where it is needed. A 5-by-8 or 5-by-10 footprint handles most basement bathrooms comfortably.
- Choose a curbed or low-profile shower base with a proper membrane rather than a tiled floor pan unless your installer does pans routinely. The base is the single highest-risk waterproofing detail in the room.
- Size the exhaust fan for the room and duct it outside. A fan that dumps into the joist cavity moves the mold problem; it does not solve it.
- Pick mold-resistant finishes. For bathroom paint color ideas below grade, the finish matters more than the color: a mildew-resistant bathroom-rated paint in satin or semi-gloss wipes down and resists moisture better than flat wall paint. Lighter colors also help a windowless room feel less like a basement.
- Leave access panels at the ejector pump and shower valve. Serviceability is part of moisture management, because a pump you can reach gets maintained and a pump buried behind tile gets ignored until it fails.
What This Means for Your Budget and Your Contractor Conversation
Proper basement bathroom waterproofing is about preventing a second project, the tear-out-and-rebuild kind, more than it is a line item on the first one. The materials involved, rigid foam, moisture-resistant board, a shower membrane, and subfloor panels, add modest cost relative to the plumbing and fixtures. What they buy is a room that can take a humid August, a long shower schedule, and a minor mishap without growing anything behind the walls.
When you interview a contractor for a basement bathroom, ask these questions directly and listen for specifics, not reassurance:
- Where does the vapor retarder go in your wall assembly, and what happens if the cavity gets wet?
- What do you put between my flooring and the slab, and why?
- How do you restore the vapor barrier where the slab is cut for plumbing?
- Which permits will you pull for this jurisdiction, and which inspections happen before walls close?
- What goes behind the tile in the shower, and what membrane do you use?
A basement-focused contractor should answer all five without hesitation, because these decisions come up on every below-grade bathroom. A generalist remodeler who treats basements as an add-on may not have thought past the fixture list. The waterproofing questions are a fast way to tell the difference, and in a below-grade bathroom, the difference is the whole project.
If you need basement finishing, STL Basement Finishing can help.
Prefer to talk it through? Call (314) 916-6297 — a quick call is usually the fastest way to get a straight answer for your situation.