Basement Bar Construction: Wet Bar Plumbing, Counters, and Code Rules Step by Step
If you have had water in your basement before, the idea of adding a bar with plumbing down there probably sounds like asking for trouble. That instinct is worth listening to. Basement wet bar construction, with plumbing included, is one of those projects where the order of operations matters more than the finishes. Do the moisture work and the rough-in the right sequence, with the right inspections, and a wet bar in a St. Louis basement holds up fine. Skip those steps, and you end up with the exact scenario you are afraid of: warped cabinets, a musty smell, and a drain that was never vented correctly in the first place.
This guide walks through the process the way a basement-only contractor actually builds it, stage by stage, so you know what has to happen before anyone hangs a cabinet.
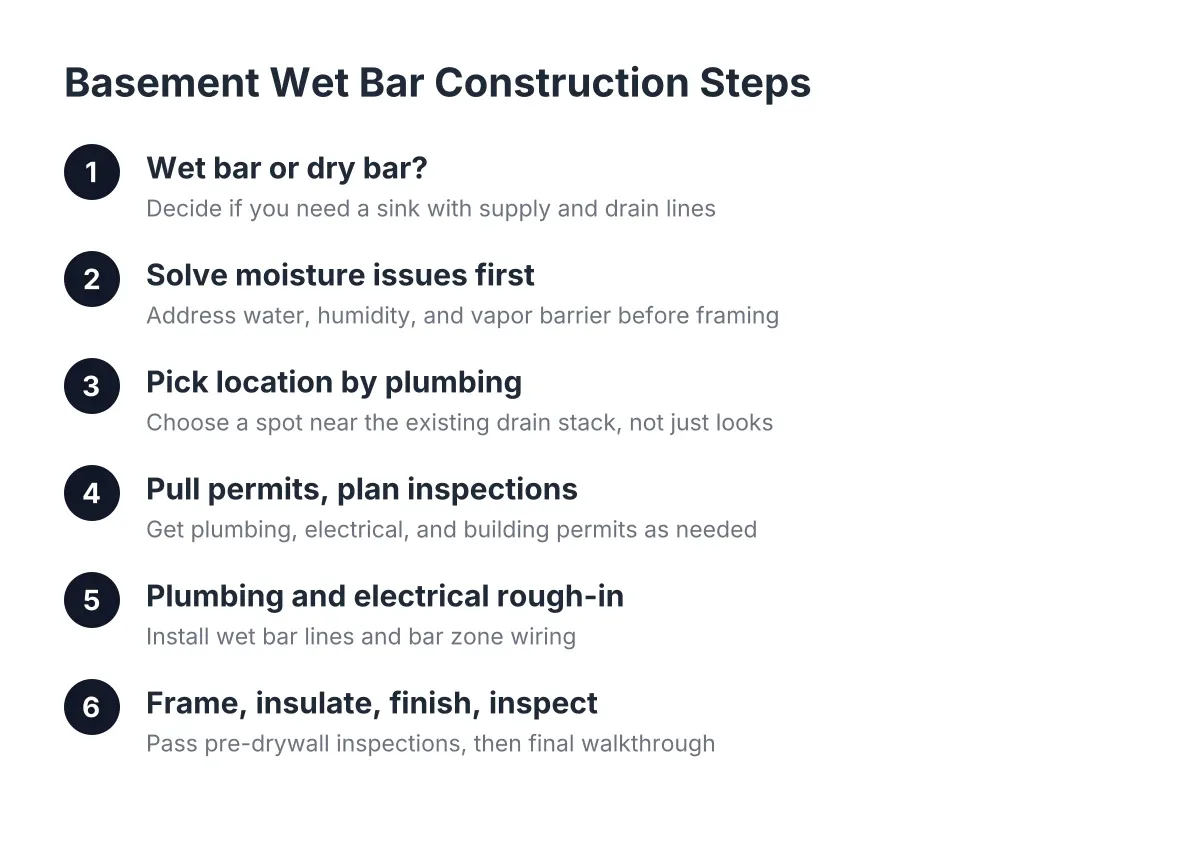
Step 1: Decide Whether You Want a Wet Bar or a Dry Bar
A wet bar has a sink with supply lines and a drain. A dry bar has counters, storage, maybe a beverage fridge, and no plumbing. That one difference changes almost everything downstream: the permit scope, the cost, the slab work, and the inspection schedule.
For a homeowner who has been burned by water before, this is the honest first question. A dry bar with a good undercounter fridge handles most entertaining needs and never introduces a new drain line into your basement. A wet bar earns its keep when you are rinsing glasses, filling a kettle, or running an ice maker often enough that walking upstairs gets old.
If you choose wet, commit to doing the plumbing correctly. A sink that drains into a pipe with no proper vent, or a drain glued into the slab without a permit, is where basement bar horror stories start.
Step 2: Solve the Moisture Problem Before Any Bar Framing Starts
No bar, wet or dry, should go into a basement with an unresolved water issue. If you have seen water after heavy rain, smelled mustiness in July, or had a home inspection flag efflorescence on the foundation walls, that gets addressed first. Finishing over it does not make it go away; it hides the evidence until the damage is expensive.
Here is what a careful contractor checks before quoting any basement bar project, whether you are planning wet bar construction or a dry bar option:
- Where water has entered before, and whether grading, gutters, or downspout extensions explain it
- Whether the slab shows signs of vapor transmission, such as darkened patches or lifted paint
- Sump pump condition and whether a backup makes sense for your lot
- Humidity levels through a St. Louis summer, not just on the day of the walkthrough
- Whether the subfloor plan includes protection against a future moisture event
That last point matters even in dry basements. A vapor barrier placed over the base course under a concrete slab is meant to block moisture transmission from the ground into the concrete above, according to W. R. Meadows. However, many older St. Louis homes were poured without one, and even a basement with an existing vapor barrier under the slab can still benefit from a subfloor system that protects the finished space from a future water event. A plywood subfloor over a raised underlayment gives a wet bar's cabinets a fighting chance if water ever shows up again.
Be realistic about scope here. If your foundation is actively failing or water comes in under pressure during storms, that is a structural or waterproofing project that comes before finishing, and it may need an engineer rather than a finishing contractor.
Step 3: Pick the Bar Location Based on Plumbing, Not Just Looks
Where the bar goes should be driven by two things: how far you are from the existing drain stack, and what is behind the wall you want to build against. Pinterest boards start with the sightline to the TV. Plumbers start with the stack.
If your main stack is on the north wall and you want the bar on the south wall, every foot between them is trenched slab or an ejector pit. A sink drain needs proper slope and a vent connection, and in a basement that often means breaking concrete to reach a line below the slab. Suppose a homeowner in South County wants a 10-foot wet bar on the wall opposite the utility room. In that scenario, moving the bar to share a wall with the utility room might cut the plumbing scope roughly in half, because the drain, vent, and supply lines are a few feet away instead of thirty.
Also think about load-bearing walls and beam posts. A steel column in the middle of your planned bar run is not a dealbreaker; it can be wrapped and absorbed into the design. But a load-bearing wall assessment should happen before the layout is final, not after cabinets are ordered.
One design note while you are planning: aligning the bar, a half wall, and the TV wall along the same plane makes a basement read as one intentional space instead of a collection of corners. It costs nothing to plan for and is hard to fix later.
Step 4: Pull the Permit and Plan the Inspection Sequence
Do I need a permit for a basement wet bar? In St. Louis and the surrounding municipalities, yes, in almost every practical case. Adding a sink means new drain, vent, and supply plumbing, and that work gets a plumbing permit and inspection. New circuits for the bar area need an electrical permit. Framing new walls as part of a larger basement finish typically brings a building permit too.
The fee itself is rarely the issue; what varies is each municipality's process, so confirm requirements with your local building department before work starts. A contractor who waves off the permit question is telling you how they handle everything else.
Expect at least two rough-stage inspections before drywall: an electrical rough-in inspection, and later an insulation inspection, with a plumbing rough-in inspection for the wet bar lines. Unpermitted wet bar plumbing is a common home inspection finding when these houses sell, and retrofitting a vent through finished walls costs far more than doing it right the first time.
Step 5: Understanding Basement Wet Bar Construction and Plumbing Installation
This is the stage that separates basement wet bar construction from basic basement carpentry. The plumber runs three things: a drain with the correct slope, a vent that ties into the venting system or uses an approved alternative where code allows, and hot and cold supply lines. If the drain has to go below slab level, the crew saw-cuts the concrete, trenches, sets the pipe, and patches the slab after the rough-in inspection passes.
Two details matter for the moisture-cautious homeowner. First, insist on a shutoff valve for the bar supply lines in an accessible spot, so a future leak can be isolated in seconds. Second, if your drain cannot reach the main line by gravity, a small ejector or drain pump is the standard answer; it adds cost and a maintenance item, which is worth knowing before you commit.
As of 2026, plumbing inspectors in the St. Louis area look closely at venting on basement bar sinks, because improvised installs are so common. A properly vented drain is also what keeps sewer gas out of the room, which matters when the complaint that brought you here was a bad smell after rain.
Step 6: Run the Electrical for the Bar Zone
A bar area concentrates loads: a beverage fridge, an ice maker, a microwave, under-cabinet lighting, and outlets along the counter. Those typically land on dedicated circuits, with GFCI protection at countertop receptacles near the sink. This is work for a licensed electrician even if other parts of the project are DIY, and the same goes for any HVAC changes; both trades carry licensing requirements and real safety stakes.
Material choices matter in a basement. Standard non-metallic cable (Romex) is not best practice for exposed runs, and running it inside EMT conduit is against code in damp or wet locations, per the National Electrical Code (NFPA 70). Where metal EMT conduit is used and connected rigidly and continuously back to the panel, the conduit itself can serve as the grounding path without a separate ground wire pulled through it, according to NEMA. You do not need to memorize any of that; you need an electrician who already knows it, and a rough-in inspection that confirms it.
Step 7: Frame, Insulate, and Pass the Pre-Drywall Inspections
With plumbing and electrical roughed in and signed off, framing closes around them. Any wall carrying the bar's weight gets blocking for cabinet mounting, and the wall behind a sink run should be framed with future access in mind. Insulation goes into exterior walls next, followed by the insulation inspection.
This is also where the broader basement finishing process and the bar project merge into one schedule. The bar is rarely a standalone job; it usually rides along with the full finish, sharing the same framing, drywall, and flooring stages. That is good news for cost, because the crews are already mobilized.
Step 8: Install the Subfloor, Counters, and Finishes That Survive a Damp Basement
Material selection is where a moisture-burned homeowner gets to stack the deck. The goal is simple: if water ever shows up again, the bar should shrug it off instead of soaking it up.
- Subfloor: a plywood subfloor over a raised, moisture-tolerant underlayment keeps finished flooring and cabinet bases off the slab.
- Cabinets: plywood boxes on adjustable legs or a raised toe kick outperform particleboard sitting directly on concrete.
- Counters: quartz or solid surface over a fully sealed substrate; avoid raw MDF anywhere near the sink.
- Backsplash: tile or a solid panel behind the sink run, sealed at the counter joint.
- Upper storage: open floating shelves instead of upper cabinets keep a below-grade room feeling open and give moisture nowhere to hide.
For example, say a homeowner in the Metro East with a history of seepage budgets a wet bar as part of a larger finish. In that illustrative case, spending a modest share of the bar budget on the subfloor system and plywood cabinet construction, rather than on a fancier faucet, is the trade that pays off the next time a storm tests the house. Costs vary with drain distance, slab work, and finishes, so treat any figure you see online as a starting point, not a quote.
Step 9: Final Inspections and the Walkthrough Checklist
After drywall, paint, flooring, counters, and fixtures, the final inspections close out the permits. Before you call basement wet bar construction complete, walk it with this checklist:
- Run the sink for several minutes and check the trap, supply connections, and shutoff valve for drips.
- Confirm the drain empties fast with no gurgle; gurgling suggests a venting problem.
- Test every GFCI receptacle with its test button.
- Open the access panel or cabinet back and confirm you can reach the shutoffs without tools.
- Get copies of the closed permits and inspection records for your file; they matter at resale.
A finished basement bar should come with paperwork, not promises. If you have had water before, that stack of passed inspections, plus a subfloor and plumbing rough-in you watched happen, is what lets you pour a drink down there without listening for rain.
If you need basement finishing, STL Basement Finishing can help.
Prefer to talk it through? Call (314) 916-6297 — a quick call is usually the fastest way to get a straight answer for your situation.