Basement Finishing Timeline: Typical Project Duration, Phase by Phase
If you have already decided to finish your basement, the next question is scheduling: what does a basement finishing timeline typically look like from the first phone call to the final walkthrough? Understanding the basement finishing timeline phases and how they work is essential for planning your project. The honest answer is that the calendar depends less on square footage than most homeowners expect, and more on permits, inspections, and how many decisions get made before the crew shows up. This guide walks through every phase in order, explains what happens in each one, what can stretch it, and what you can do to keep the whole thing moving.
One note before we start. You will not find hard week counts or day counts here, and that is deliberate. Any contractor who quotes you a firm duration before seeing your basement, your municipality's permit process, and your material selections is guessing. What we can do is lay out the sequence, the dependencies, and the factors that decide whether your project runs tight or drags. That is more useful than a number that turns out to be wrong.
Why Your Basement Finishing Timeline Varies So Much Across Phases
A typical basement finishing timeline varies because two projects with identical square footage can involve wildly different scopes. A basement with a bathroom addition needs plumbing rough-in, a possible slab cut, and extra inspections that a simple open rec room never touches. Permit review speed, inspection scheduling, and how fast you make selections matter as much as the physical work.
Think about what actually consumes calendar time on a basement project. It is rarely the hammering. It is the waiting: waiting on permit approval, waiting on an inspector's next available slot, waiting on a special-order vanity, waiting on drywall mud to dry between coats. The trades themselves move fast once they are on site.
Here are the biggest variables that separate a short project from a long one:
- Scope. A finished basement with framed walls, drywall, and carpet is the baseline. Add a basement bathroom, a basement bar with plumbing and electrical, or load-bearing wall changes, and each addition brings its own rough-in, inspection, and finish phase.
- Permits and inspections. In St. Louis and the surrounding municipalities, finished basement work requires a permit, and inspections happen at fixed checkpoints. You cannot close up a wall until the rough-in behind it passes.
- Moisture conditions. If the slab or foundation walls show moisture problems, those get corrected first. Skipping this step to save time is how finished basements fail two winters later.
- Decision speed. Every unmade selection, flooring, paint color, bar top material, is a future delay. Homeowners who lock choices before demo starts run shorter projects.
- Existing conditions. Older St. Louis homes often hide surprises behind the current state of the basement: undersized electrical panels, out-of-code wiring, or drainage issues that only show up once work begins.
For a Budget-First reader, the timeline matters for a practical reason: a longer project usually means more labor cost and more opportunity for change orders. Understanding the phases below is how you spot a schedule that is padded, or one that is unrealistically thin.
The Basement Finishing Timeline Phases in Sequence
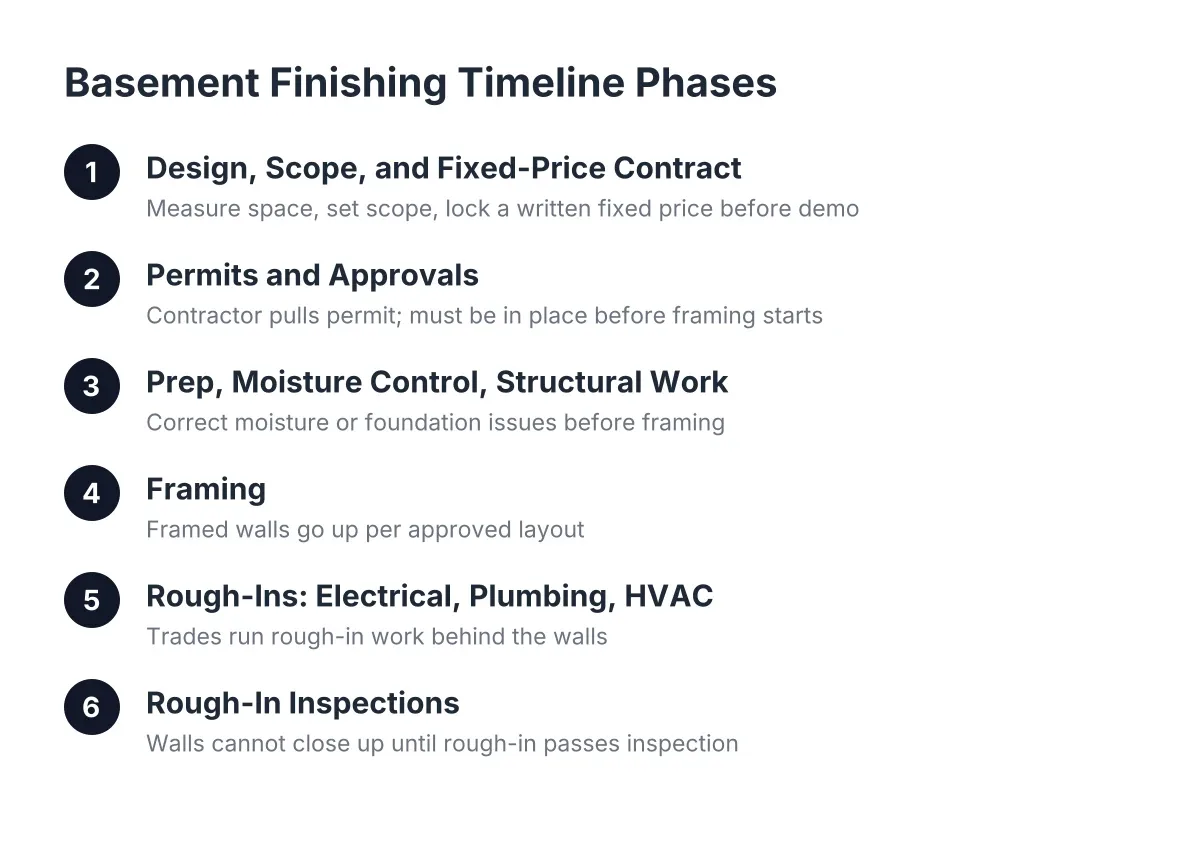
Every well-run basement project in St. Louis moves through the same sequence. The names may differ from contractor to contractor, but the order does not, because building inspections enforce it. Here is the typical basement finishing timeline broken into its working phases.
Phase 1: Design, Scope, and the Fixed-Price Contract
This phase happens before anyone swings a hammer, and it is where budget-conscious homeowners either protect themselves or set up future surprises. The contractor measures the space, checks ceiling height, locates the mechanicals, and assesses any load-bearing wall that affects the layout. You decide what the basement will be: living space, a basement bar, a bathroom, or all three.
The output of this phase should be a written scope with a fixed price attached to it, plus a clear list of what is excluded. If you have been burned by vague verbal estimates before, this is the document that prevents the mid-project "well, that wasn't included" conversation. Everything that follows on the calendar depends on how complete this scope is.
Therefore, do not rush it. A day spent nailing down whether the bar gets a sink, or whether the bathroom gets a shower or just a toilet and vanity, saves a week of rework later. Plumbing decisions in particular are hard to reverse once the slab work is done.
Phase 2: Permits and Approvals
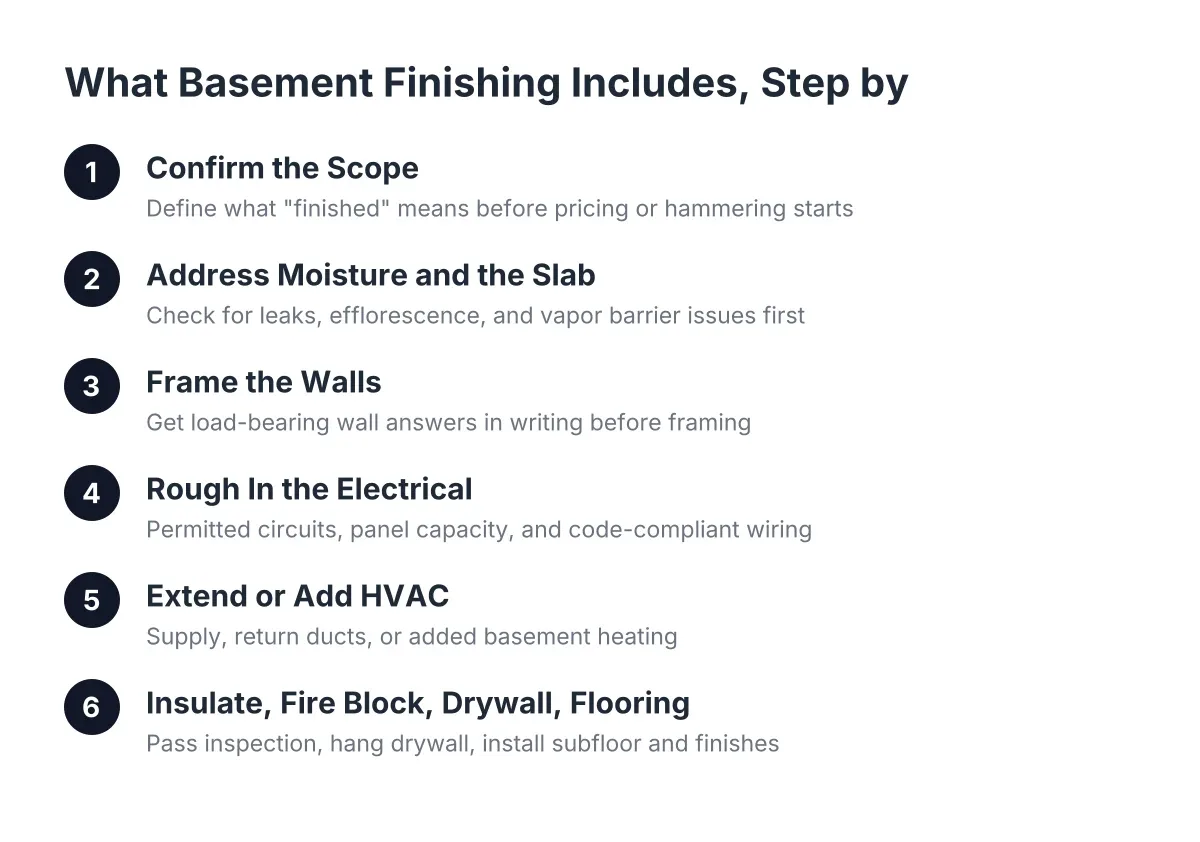
Do I need a permit to finish a basement in St. Louis? Yes. Finishing a basement involves framing, electrical, and often plumbing and HVAC work, all of which require a permit and inspections in St. Louis, MO and the surrounding municipalities. Your contractor should pull the permit, not you, and the permit should be in place before framing starts.
Permit review time is out of everyone's hands, and it varies by municipality and by how busy the building department is. What your contractor controls is submitting a complete application the first time. Incomplete drawings or a missing plumbing rider bounce back for revision, and every bounce adds calendar days.
For a small landlord, this phase is not optional overhead. Unpermitted basement work surfaces at appraisal, at refinance, and at sale. If you are finishing a lower level in a rental to add livable space, the permit trail is what lets that space count. Chasing the cheapest bid from someone who suggests skipping the permit is how a value-add project turns into a liability.
Phase 3: Prep, Moisture Control, and Any Structural Work
Before framing, the basement gets prepared. That means addressing any moisture issues at the slab or foundation walls, completing any load-bearing wall assessment and framing changes, and cutting the slab if a new basement bathroom needs drain lines where none exist. Slab cuts and drain rough-ins are noisy and dusty, but they are usually brief.
Moisture control deserves a specific mention because it is the corner most often cut on cheap bids. Concrete transmits ground moisture, which is why a vapor barrier under a slab exists in the first place; according to W. R. Meadows, a vapor barrier over the base course under a concrete slab blocks moisture transmission from the ground into the concrete above. In a retrofit, your contractor works with the slab you have, which means testing for moisture and choosing subfloor and flooring systems accordingly.
If your project includes a plywood subfloor over the slab, it goes in during this phase or right after framing, depending on the system. A proper subfloor separates your finished flooring from the concrete, adds warmth underfoot, and gives carpet or hardwood a stable, dry base. Skipping it saves money on day one and costs you flooring replacement later.
Phase 4: Framing
Framing is the fast, satisfying phase. Walls go up, doorways appear, and the basement starts looking like rooms instead of open concrete. A typical crew frames an average basement in a matter of days, not weeks, assuming the layout was settled in Phase 1.
However, framing speed depends on the plan being final. Moving a wall after electrical rough-in means redoing electrical rough-in. This is the phase where changing your mind gets expensive, which is exactly the change-order scenario budget-focused homeowners worry about. A good contractor walks the framed layout with you before the trades arrive, precisely so you can catch anything that feels wrong while it is still cheap to fix.
Phase 5: Rough-Ins for Electrical, Plumbing, and HVAC
With framing up, the electrician, plumber, and HVAC installer run everything that lives inside the walls: wiring, outlets, switch boxes, supply and drain lines for the bathroom and bar, and ductwork or other basement heating. This phase determines how comfortable and functional the finished space actually is, and it is licensed-trade territory.
Even homeowners who handle some work themselves should hire licensed electricians and HVAC contractors for these systems. The licensing exists for a reason, and inspectors check this work closely. On the electrical side, methods matter as much as materials; for example, the National Electrical Code (NFPA 70) does not treat non-metallic sheathed cable as best practice for exposed conduit runs, and running it inside EMT is against code in damp or wet locations. Basements are exactly where those distinctions apply.
Heating is worth planning here, not later. A basement without dedicated heat is a basement nobody uses from November to March. Whether that means extending ductwork or adding a separate heat source depends on your existing system's capacity, and it needs to be decided before the walls close.
Phase 6: Rough-In Inspections
Once the rough-ins are complete, work stops for inspections. Basement projects typically involve an electrical rough-in inspection first, followed later by an insulation inspection, and plumbing rough-ins get their own sign-off where a bathroom or bar is involved. Nothing gets covered with insulation or drywall until the inspector approves what is behind it.
This is the phase homeowners find most frustrating, because the crew may be off site while everyone waits for an inspection slot. It looks like nothing is happening. In reality, this is the system working: an inspector confirming that the wiring, plumbing, and framing behind your future drywall meet code. A contractor who schedules inspections promptly and passes them the first time is saving you real calendar days here.
Phase 7: Insulation and Drywall
After rough-in approval, insulation goes into the walls, gets its own inspection, and then drywall follows. Hanging drywall is quick. Finishing it is not, because taping and mudding require multiple coats and each coat has to dry before the next one goes on. Drying time is physics, not labor, and no crew can compress it honestly.
As a result, the drywall phase often feels slower than framing even though fewer decisions are involved. Humidity matters too, and St. Louis summers are humid; a contractor running dehumidification during mudding is managing the schedule, not padding it. When the sanding is done, the space suddenly reads as finished rooms, and the pace of visible progress picks back up.
Phase 8: Finishes, Flooring, Trim, and the Basement Bar
The finish phase covers paint, doors, trim, flooring, bathroom fixtures, and bar construction. Two things in this phase catch homeowners off guard. First, trim work in a finished basement is more extensive than people expect; baseboard, casing, and any paneling add up to far more linear feet than a typical single room, and careful trim carpentry takes time.
Second, custom features like a basement bar sit at the end of the schedule but need decisions made at the start. A basement bar contractor needs the bar's plumbing and electrical roughed in back in Phase 5, so the bar top material, sink choice, and cabinet layout have to be locked long before the bar itself gets built. Flooring choice, carpet versus hardwood or engineered options over the plywood subfloor, also affects sequencing, since some floors go in before trim and some after.
Phase 9: Final Inspection and Walkthrough
The project ends with a final inspection from the municipality and a walkthrough with your contractor. The final inspection closes out the permit, which is the paperwork that matters at appraisal or sale. Additionally, the walkthrough is your chance to build a punch list: paint touch-ups, a sticking door, a trim gap. Hold the last payment until the punch list is done, and any contractor worth hiring will expect you to.
What Stretches a Basement Finishing Timeline Across Its Different Phases
The timeline for basement finishing stretches for a handful of predictable reasons: slow or incomplete permit submissions, failed inspections that force rework, late homeowner selections, special-order materials, and surprises hiding in the existing structure. Weather and trade availability play a role, but decision delays and inspection cycles are the most common culprits.
For example, suppose a landlord in south St. Louis is finishing the basement of a two-family to add livable square footage before a refinance appraisal. The framing and drywall go fine, but the bathroom vanity was a special-order item selected three weeks into the project instead of before demo. In that scenario, the whole finish phase stalls waiting on one fixture, the appraisal gets pushed, and the carrying costs of the delay exceed what the vanity cost. The fix was free: pick everything before the permit is even submitted.
Other stretch factors to plan around:
- Failed inspections. Every failure means a correction and a re-inspection, and each cycle burns days. This is one reason the cheapest bid is often the slowest project.
- Change orders. Moving a wall or adding a bar sink after rough-in reruns earlier phases. Change orders cost money and calendar time in equal measure.
- Hidden conditions. An undersized panel or unexpected drainage problem discovered during demo has to be fixed before work continues. A thorough pre-project assessment reduces these, but cannot eliminate them, and a good contract states in advance how they will be priced.
- Material market swings. When material prices are climbing sharply, waiting for prices to stabilize can be the smarter financial move than starting mid-spike, especially for an investor running numbers across multiple units.
One honest trade-off to weigh before you commit: a finished basement does not always return its full cost at resale unless the renovation is done at a consistent, fully committed level. For a landlord, the math often works through rent and appraised livable space rather than direct resale value, so run your own numbers for your own exit.
How to Keep Your Basement Project On Schedule
You control more of the calendar than you might think. The homeowners and landlords whose projects finish on time do the same few things, none of which require construction knowledge.
- Finalize every selection before the permit goes in. Flooring, fixtures, paint, bar top, door styles. A complete selection list is the single biggest schedule protector you have.
- Get the scope in writing with a fixed price. If you are searching for basement remodeling companies near me and comparing bids, compare written scopes, not verbal ballparks. A bid that is thousands cheaper but silent on moisture control, subfloor, or permit handling is not cheaper. It is incomplete.
- Ask each bidder to walk you through their sequence. The best basement contractors near me searches surface plenty of names; the ones worth hiring can explain rough-in inspections, insulation inspections, and drywall drying time without hesitating. If a bidder cannot describe the inspection checkpoints in your municipality, keep looking.
- Confirm who pulls the permit. The answer should be the contractor. A basement finishing contractor who asks you to pull the permit as the homeowner is shifting liability onto you, and that is a red flag regardless of price.
- Respond fast during the project. When the crew asks a question, an answer the same day keeps them working. An answer next week does not.
- Do not redesign mid-stream. Walk the framed layout carefully, raise concerns then, and hold the line afterward.
If your project involves structural changes to a load-bearing wall, significant electrical service upgrades, or unresolved water intrusion, bring in the appropriate licensed professional to evaluate before you commit to a schedule at all. Those are not areas to price-shop or self-diagnose.
What a Realistic Schedule Conversation Sounds Like
By the time you sit down with a contractor, you should expect a phase-by-phase schedule tied to your specific scope, not a single number pulled from the air. Ask them to map your project against the phases above: when the permit gets submitted, which inspections apply, where the drying and curing time sits, and which of your decisions gate which phases. A contractor who has actually run basement projects in St. Louis, MO can answer all of that in plain language across the kitchen table.
The typical basement finishing timeline is not a mystery; it is a sequence with known checkpoints and known stretch points. Know the phases, lock your decisions early, insist on permits and a written scope, and the schedule takes care of itself. The projects that blow up on time and budget are almost always the ones where somebody skipped a phase, not the ones where the phases ran long.
If you need basement finishing, STL Basement Finishing can help.
Prefer to talk it through? Call (314) 916-6297 — a quick call is usually the fastest way to get a straight answer for your situation.