Plywood Subfloor Before Basement Flooring: Why St. Louis Slabs Demand It
If you have ever pulled soggy carpet off a concrete slab after a heavy St. Louis rain, you already know why this article exists. Installing a plywood subfloor over concrete before basement flooring goes down is the single biggest difference between a finished basement that survives our climate and one you tear out in three years. This guide walks through the full process, step by step: how to confirm the slab is ready, how the subfloor assembly works, and how it changes which flooring you can safely put on top. It is written for homeowners who have been burned by water before, or who just bought a house and want the basement finished right the first time.
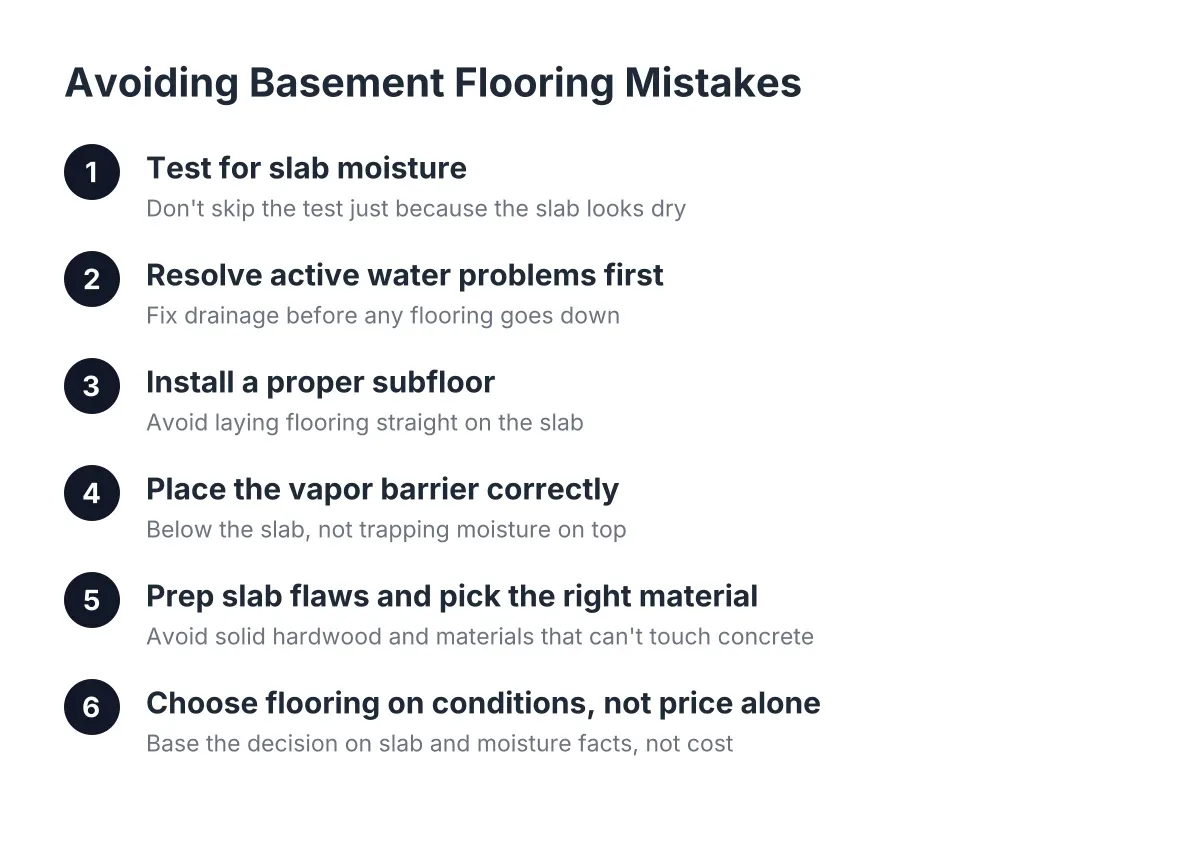
One thing up front. A subfloor is moisture management, not moisture repair. If water actively enters your basement during storms, that drainage problem gets fixed first. No flooring system covers it up successfully, and any contractor who says otherwise is telling you what you want to hear.
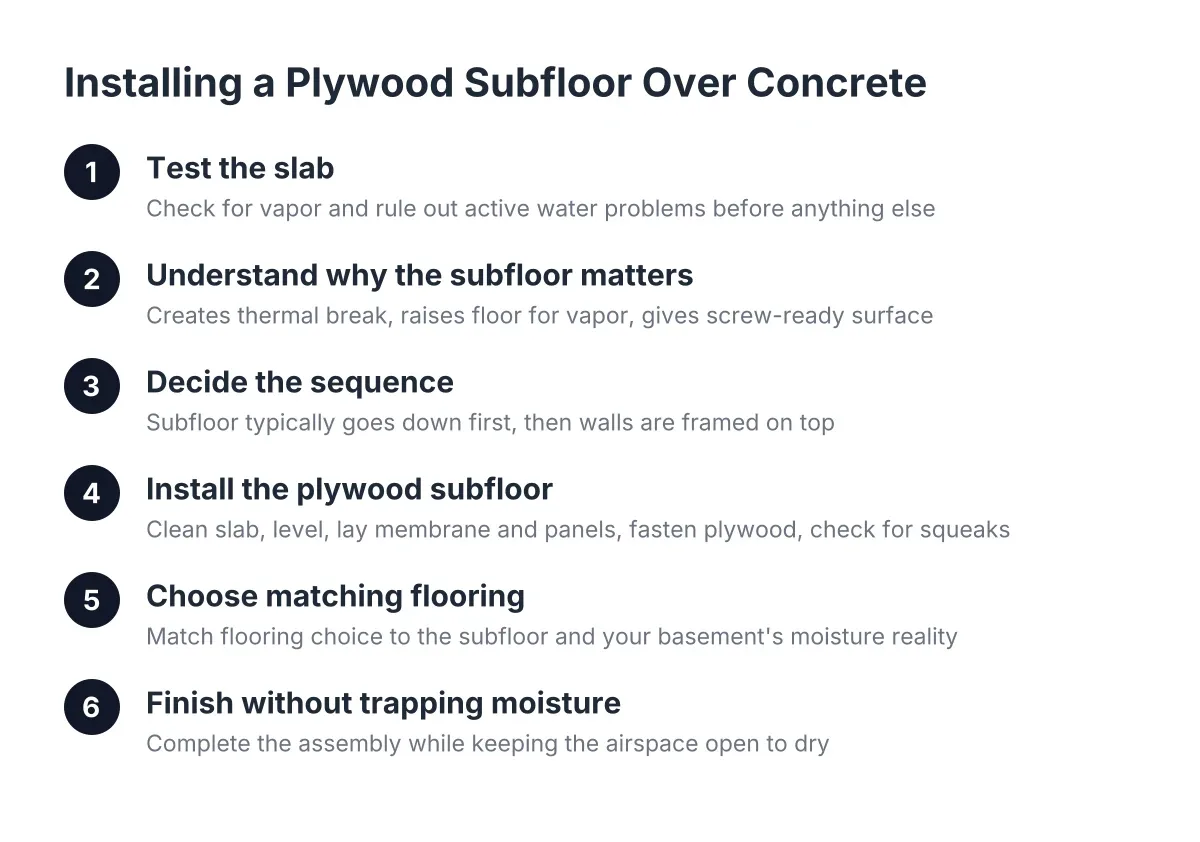
Step 1: Test the Slab and Rule Out Active Water Problems
Start with honesty about the slab, because everything above it depends on this. Concrete looks dry and still pushes water vapor upward year-round. That vapor is what ruins flooring installed directly on concrete, even in basements that never visibly flood.
Do a simple check yourself. Tape a two-foot square of clear plastic sheeting to the slab, seal all four edges, and leave it for 48 to 72 hours. Condensation or a dark spot under the plastic means the slab is transmitting moisture. Most St. Louis slabs will show at least some, especially in older homes built before vapor barriers under slabs were common practice.
Walk the perimeter after the next hard rain. Look for staining at the base of walls, efflorescence (white chalky residue on the concrete), and a musty smell that gets stronger after storms. Any sign of liquid water, not just vapor, means drainage work comes before finishing. That might be regrading, gutter extensions, or interior drainage, depending on the source. Insulating and finishing over an unresolved water problem accelerates damage instead of preventing it; that is the fastest route to the mold and warped flooring you are trying to avoid.
For context, a vapor barrier placed over the base course under a concrete slab is meant to block moisture transmission from the ground into the concrete above, according to W. R. Meadows. Many existing St. Louis basements either lack one or have one that was compromised during the original pour. You cannot see it, which is exactly why you test.
Step 2: Why Plywood Subfloor Over Concrete Matters in Basement Finishing
A plywood subfloor over concrete before the basement gets framed and floored does three jobs at once. It creates a thermal break so the floor is not cold concrete in January. It raises the finished floor off the slab so vapor has somewhere to go. And it gives you a flat, screw-ready surface for whatever flooring you choose.
The assembly matters more than the plywood itself. The standard approach pairs a dimpled plastic membrane, or panels with the dimples built in, with plywood or OSB on top. Additionally, the dimples create an airspace between concrete and wood. Moisture that migrates up through the slab can move laterally through that airspace and dry out toward drier zones, including the gap behind wall insulation, instead of accumulating under your flooring.
Here is the part that surprises homeowners who had a bad experience before. Even a basement with a vapor barrier under the slab benefits from a subfloor system, because the subfloor protects the finished space from future moisture events, not just everyday vapor. A failed water heater, a backed-up floor drain, or one unusual storm can put water on the slab. With a raised subfloor, that water has a path to dry. With flooring glued or laid directly on concrete, it gets trapped.
Step 3: Decide the Sequence, Subfloor First or Walls First
Settle the sequencing question before anyone frames a wall. In most basement finishing projects, the subfloor goes down first and walls are framed on top of it, following the subfloor manufacturer's recommendations. That sequence keeps the airspace continuous, so moisture behind the walls and under the floor can still migrate and dry.
Either way, two rules hold:
- Any bottom plate that contacts concrete must be pressure-treated lumber. Regular lumber in contact with a basement slab wicks moisture and rots.
- Do not seal off the airspace. The subfloor system works because vapor can move; blocking it defeats the purpose.
In addition, this is the stage where a contractor should assess any load-bearing wall questions. If your finishing plan involves removing or modifying framing, that assessment happens before subfloor layout, not after.
Step 4: Install Plywood Subfloor Over Concrete Before Basement Flooring Goes Down
Installation is straightforward once the slab checks out. A typical crew will:
- Clean the slab and grind down high spots. Subfloor panels tolerate minor imperfections, but humps telegraph through to the finished floor.
- Check the slab for flatness and shim or level low areas per the panel manufacturer's instructions.
- Lay the dimpled membrane or interlocking subfloor panels, leaving the required expansion gap at the perimeter. Basements move with the seasons; floors need room to do the same.
- Fasten plywood or OSB per the system's specifications, staggering seams like brickwork so joints do not line up.
- Walk every panel and fix any flex or squeak now, because it is cheap to fix today and miserable to fix under finished flooring.
A finished subfloor raises the floor height, usually an inch to an inch and a half depending on the system. Therefore, check your ceiling height and the bottom step of the basement stairs before committing. In a low St. Louis basement, that inch matters, and stair code treats an uneven bottom riser as a defect an inspector will flag.
Does a Plywood Subfloor in the Basement Need a Permit?
Basement finishing in St. Louis, MO generally requires a permit once you are framing walls, adding electrical, or installing a basement bathroom; the subfloor is usually inspected as part of that larger finishing permit rather than on its own. Requirements differ between St. Louis City and the various county municipalities, so confirm with your local building department or have your contractor pull the permit. A contractor who hesitates on the permit question is a warning sign, especially if you have already lived through one shortcut job.
Step 5: Choose Flooring That Matches the Subfloor and Your Moisture Reality
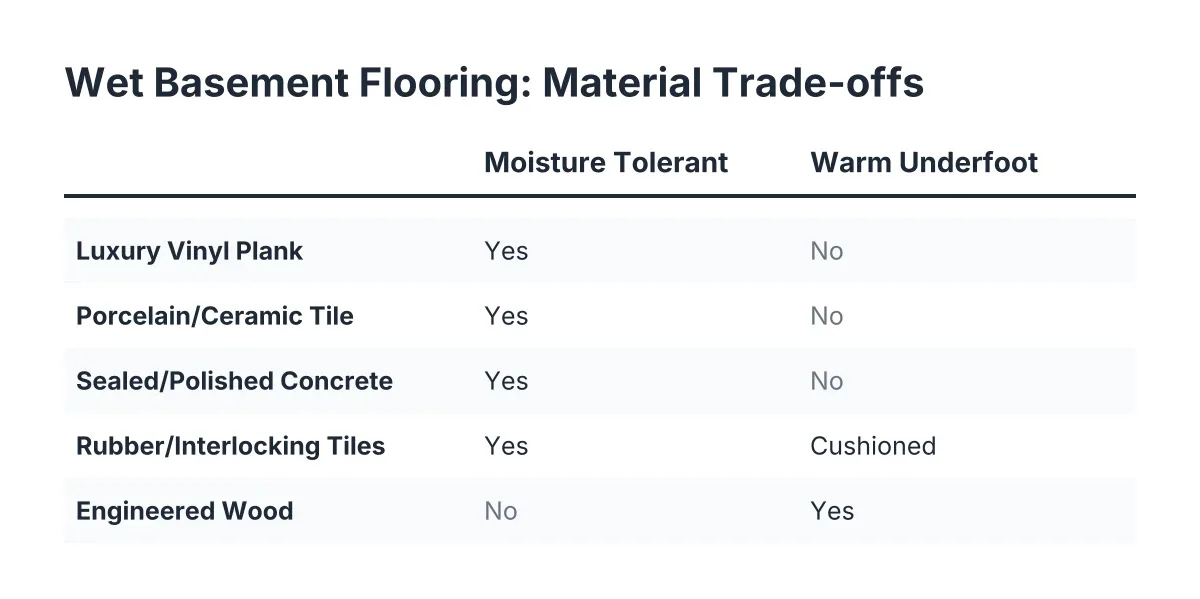
With a proper subfloor in place, your basement flooring options open up considerably. Without one, they shrink to materials that tolerate direct concrete contact, and even those carry caveats. Here is how the main choices stack up over a plywood subfloor in a St. Louis basement:
- Luxury vinyl plank (LVP). The workhorse for basements. It resists humidity and will not cup, bow, or buckle the way solid or engineered wood can. One caveat even over plywood: when LVP goes over bare concrete anywhere in the project, it needs a dedicated moisture-protective underlayment, even if the planks have padding attached. The attached pad is for comfort and sound, not moisture.
- Carpet. Comfortable, warm, and the natural choice if the space is a kids' play area, where a soft surface is close to essential. Over a raised subfloor, carpet is a defensible choice; glued directly to a slab, it is the material most likely to hold odor and mold after any moisture event.
- Tile. Durable and waterproof at the surface, though colder underfoot and harder on dropped glassware, which matters if you are building a basement bar.
- Solid hardwood. Honest answer: skip it below grade. Basement humidity swings will move it no matter what is underneath.
As a result, the subfloor decision and the flooring decision are one decision. Suppose a family closes on a 1960s ranch in South County with an unfinished basement and a $35,000 budget to finish it before the school year. Say the plastic-sheet test shows moderate vapor and the inspection report flagged old water staining near one corner. In that scenario, the right plan is drainage correction at that corner first, then a dimpled-panel subfloor across the full footprint to go over concrete, then LVP in the main room and bar area with carpet in the kids' zone. That family spends more on the floor assembly than a slap-down carpet job would cost, and they are the ones whose basement still smells like nothing after the first spring storm.
Cost-wise, the subfloor adds a per-square-foot line item on top of the finished flooring itself. What drives that number: slab condition and leveling needs, the panel system chosen, basement size and layout, and whether framing sequencing requires extra coordination. A clear proposal breaks the subfloor out as its own line so you can see exactly what you are paying for; a vague one buries it, or omits it entirely.
Step 6: Finish the Assembly Without Trapping Moisture
Once the subfloor with its thermal break and airspace is in place, the finishing sequence above it stays simple: vapor barrier where the wall assembly calls for it, drywall, and then the vinyl plank or other flooring installed on top. Keep perimeter gaps covered by trim, not caulked airtight, so the system can breathe.
Afterward, control the air. Run a dehumidifier through St. Louis summers and keep the finished space heated in winter; basement heating is part of moisture control, not just comfort. A dry slab under a well-built floor still lives in a humid region, and humidity management is the ongoing half of the job.
One honest limitation to close on. If your basement has taken standing water more than once, or the plastic-sheet test shows heavy moisture, bring in a professional to diagnose the source before any finishing work starts. A subfloor manages vapor and buys you resilience against the occasional incident; it does not fix grading, failed drain tile, or hydrostatic pressure. Getting that diagnosis first is what separates a finished basement you trust from one you quietly worry about every time the forecast shows rain.
If you need basement finishing, STL Basement Finishing can help.
Prefer to talk it through? Call (314) 916-6297 — a quick call is usually the fastest way to get a straight answer for your situation.