Bathroom Subfloor Waterproofing in a Basement: How to Prep for Vinyl Flooring
If you have ever pulled soggy carpet out of a basement after a heavy St. Louis rain, you already know why bathroom subfloor waterproofing matters more below grade than anywhere else in the house. A basement bathroom sits on a concrete slab that can wick ground moisture upward year-round, and the room itself adds showers, toilets, and supply lines on top of that. This guide walks through the process step by step, with the goal of ending at the flooring that handles basement bathrooms better than anything else: waterproof luxury vinyl plank. Follow the sequence and you get a floor that survives both the plumbing above it and the slab below it.
One note before the first step. This is basement-specific guidance. Advice written for a second-floor bathroom assumes moisture only comes from above. In a basement, it comes from both directions, and the steps below account for that.
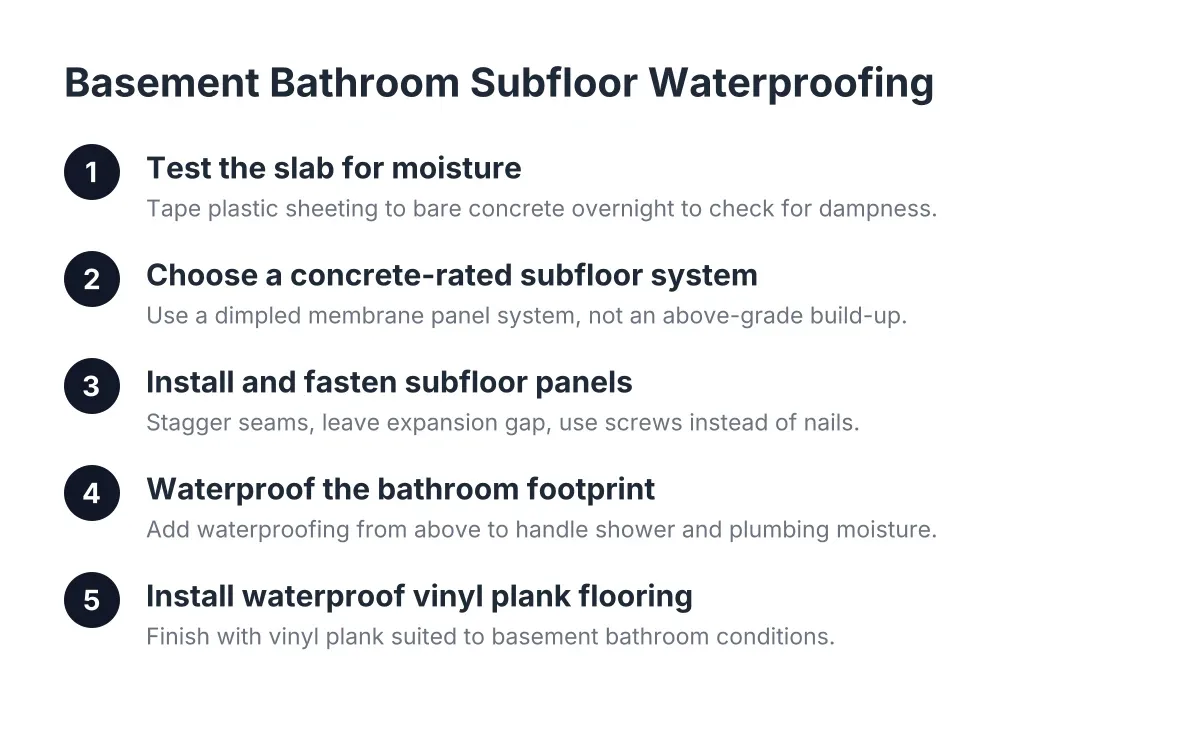
Step 1: Test the Slab for Moisture Before You Buy Anything
Start with a simple field test. Tape a garbage bag or a square of plastic sheeting flat against the bare concrete where the bathroom will go, seal all four edges with tape, and leave it overnight. Condensation or a dark, damp spot under the plastic the next morning tells you moisture is moving up through the slab and there is likely no vapor barrier underneath it.
This matters because a vapor barrier placed under a concrete slab is meant to block moisture transmission from the ground into the concrete above, according to W. R. Meadows. Many older St. Louis homes, especially those built before modern slab practices, never got one. If your test comes back wet, plan on a full subfloor system with a moisture barrier, not just flooring glued to concrete.
However, a dry test does not mean you can skip protection. Even a basement with a vapor barrier under the slab benefits from a subfloor system, because it protects the finished space from future moisture events, the kind that come with a spring downpour, a failed sump pump, or a supply line leak in the new bathroom itself.
If your test reveals standing water sources, active seepage through walls, or foundation cracks that widen after rain, stop here and bring in a professional. Finishing over an unresolved water intrusion problem is how homeowners end up ripping out a basement bathroom twice. Any contractor who wants to lay flooring without asking where your water comes from is repeating the mistake that burned you the first time.
Step 2: Choose a Subfloor System Built for Concrete, Not a Bedroom Floor
Skip the above-grade playbook. On a basement slab, the best-performing approach is a dimpled membrane subfloor panel system raised slightly off the concrete. The dimples create an airspace under the floor, which does two jobs at once. First, the plastic layer acts as a basement subfloor moisture barrier between damp concrete and your finished floor. Second, the airspace lets water vapor migrate to drier zones and escape instead of accumulating under your bathroom.
Alternatively, some installers build up a plywood subfloor over rigid foam and a separate vapor barrier sheet. That works, but it takes more height and more labor. For a basement bathroom, where a leak someday is a realistic possibility, the dimpled panel system gives you drainage and drying capacity the flat build-up does not.
For the top layer, use tongue and groove subfloor panels rated for the system you chose. Tongue and groove subfloor installation locks each panel to its neighbors, which keeps edges from deflecting under a toilet flange or a vanity leg. Butt-edge panels on a floating floor telegraph every seam.
Step 3: Install the Subfloor Panels and Fasten Them Correctly
Lay out panels starting from the longest straight wall, staggering seams so no four corners meet at one point. Leave the expansion gap the manufacturer specifies at every wall, typically about a quarter inch, so the floor can move with humidity swings without buckling.
Fastening depends on your system. Floating dimpled-panel systems often need no fasteners into the slab at all, which is a plus; every hole through the membrane is a potential moisture path. Where the plans call for anchoring, or where you are attaching a plywood subfloor layer to sleepers, use screws rather than nails. Flooring screws hold under the moisture cycling a basement sees; nails back out as panels expand and contract, and a squeaky, loose bathroom subfloor is the first sign of trouble you will not be able to see.
If you are covering a full basement, collated subfloor screws driven with a stand-up gun save your knees and keep spacing consistent. For a single bathroom footprint, a drill and a pouch of screws is fine. Either way:
- Set screw heads flush or slightly below the surface, never proud, so the flooring underlayment lies flat.
- Follow the panel maker's fastening pattern; over-fastening a floating system defeats the point of letting it float.
- Do not fasten through the dimpled membrane into concrete unless the manufacturer's instructions call for it.
In addition, if walls will sit on top of the floating subfloor, frame them per the subfloor manufacturer's guidance. Done right, moisture behind the walls and beneath the floor shares that same airspace and can dry out instead of feeding mold. This is also the stage where basement subfloor installation intersects with the rest of the project: plumbing rough-in for the bathroom, any load-bearing wall assessment, and permits should all be settled before the finished floor goes down. In St. Louis, a basement bathroom addition involves plumbing and electrical work that requires a permit, so confirm inspections are scheduled before you close anything up.
Step 4: Waterproof the Bathroom Footprint From Above
Now handle the water that comes from inside the room. Bathroom subfloor waterproofing at this stage means protecting the panel surface from shower splash, toilet condensation, and the slow leaks that show up years later.
Should you waterproof a bathroom floor even when the flooring itself is waterproof vinyl? Yes. Vinyl plank sheds water on its surface, but water finds seams, cut edges around the toilet flange, and the gap under the vanity. The subfloor beneath needs its own line of defense, because signs of subfloor rot, soft spots, a spongy feel near the toilet, or a musty smell after showers, only appear after the damage is done.
For a basement bathroom over a panel subfloor, that defense looks like this:
- Seal panel seams within the wet zone with the sealant or seam tape your subfloor manufacturer specifies.
- Install a dedicated moisture-protective underlayment across the bathroom floor. Treat this as mandatory over any concrete-based assembly, even when your vinyl planks come with a pre-attached underlayment pad. The attached pad is for sound and comfort, not vapor protection.
- Around the shower, follow the shower system's own waterproofing details; subfloor shower waterproofing is governed by the pan or membrane system you install, and mixing methods voids most warranties.
- Caulk the flange penetration and the perimeter of the wet zone before flooring goes down.
Step 5: Install Waterproof Vinyl Plank as the Finished Floor
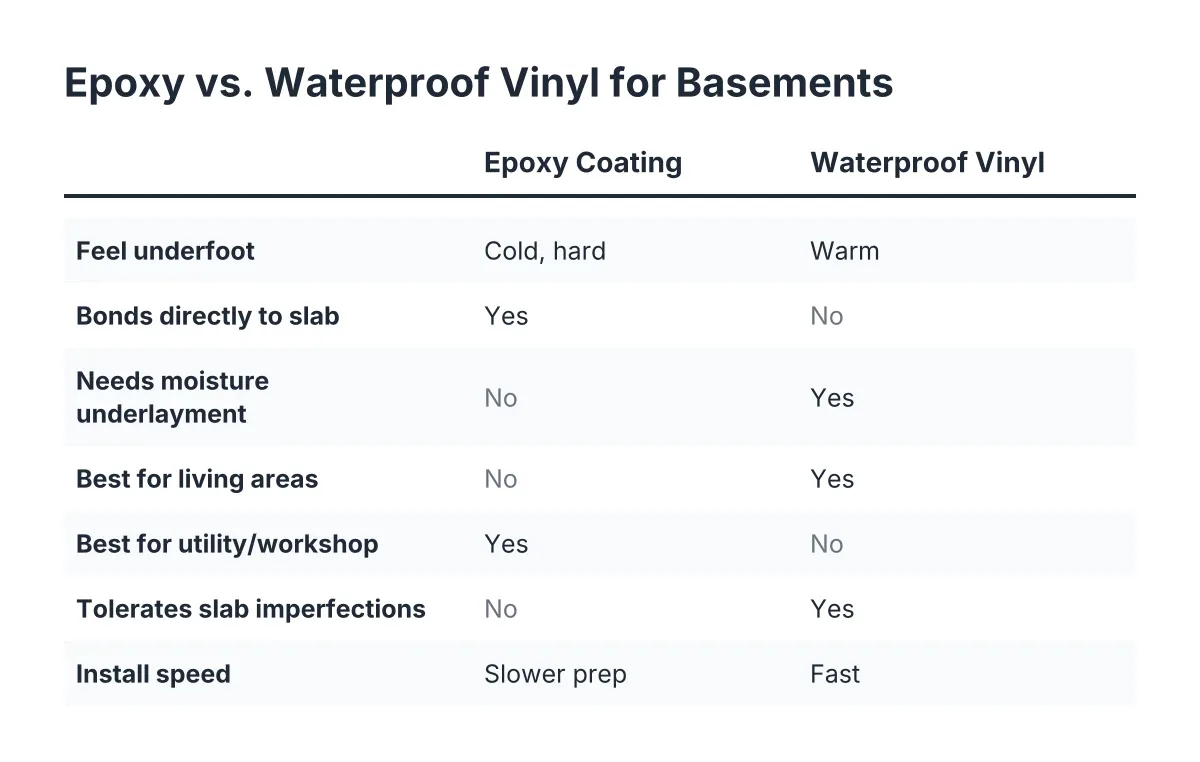
Luxury vinyl plank has become the default finished floor for basement bathrooms in 2026 for a plain reason: it handles humidity without complaint. Unlike solid or engineered wood, LVP does not cup, bow, or buckle when basement humidity swings from a dry January to a wet St. Louis July. Unlike carpet, it survives a wet event; you can mop it, dry it, and move on.
When choosing planks for a basement bathroom, look for:
- A rigid core (often labeled SPC), which bridges minor subfloor irregularities and resists denting under a vanity.
- Click-lock edges rated as water-resistant at the seam, not just a waterproof plank body.
- A wear layer of 12 mil or more if the bathroom connects to a high-traffic basement bar or family room.
Install the planks floating over your underlayment, staggering end joints and keeping the expansion gap at walls and around the flange. Cut planks around the toilet with a jigsaw and seal that cut edge. Set the toilet after the flooring, never before, so the flange sits at the right height relative to the finished floor.
There is one honest trade-off to name. A full subfloor system plus underlayment plus rigid-core vinyl costs more per square foot than gluing vinyl straight to concrete, and it raises the floor an inch or more, which can matter at stair bottoms and door thresholds. If ceiling height is already tight, talk through the build-up height with your contractor before committing.
What Success Looks Like After Water Damage
Suppose a homeowner in south St. Louis finished their basement five years ago with carpet over bare concrete, then found black staining at the tack strips after one wet spring. In that scenario, the fix is not better carpet. It is this sequence: confirm the water source is managed, install a dimpled-panel subfloor with a moisture barrier, seal the bathroom footprint, and finish with rigid-core vinyl plank. If water shows up again, it drains and dries in the airspace under the floor instead of soaking into it.
That is the real answer to how to waterproof a bathroom floor in a basement. It is not one magic membrane. It is a stack of decisions, slab test first, moisture-managing subfloor second, bathroom subfloor waterproofing details third, and waterproof vinyl last, each one assuming the layer below it will get wet someday. In a St. Louis basement, that assumption is not pessimism. It is the plan.
If you need basement finishing, STL Basement Finishing can help.
Prefer to talk it through? Call (314) 916-6297 — a quick call is usually the fastest way to get a straight answer for your situation.