What’s Included in Basement Finishing: Framing, Electrical, HVAC, and Drywall
If you have priced basement finishing in St. Louis, you have probably heard numbers that range from fifteen thousand dollars to eighty thousand and wondered why nobody explains the gap. The answer is buried in scope. Two quotes can both say "finish the basement" and include wildly different amounts of framing, electrical, HVAC, and drywall work. This guide breaks down what a complete basement finish actually includes, step by step, in the order the work happens. Once you know what each phase covers, you can compare quotes line by line instead of guessing which contractor is cutting corners.
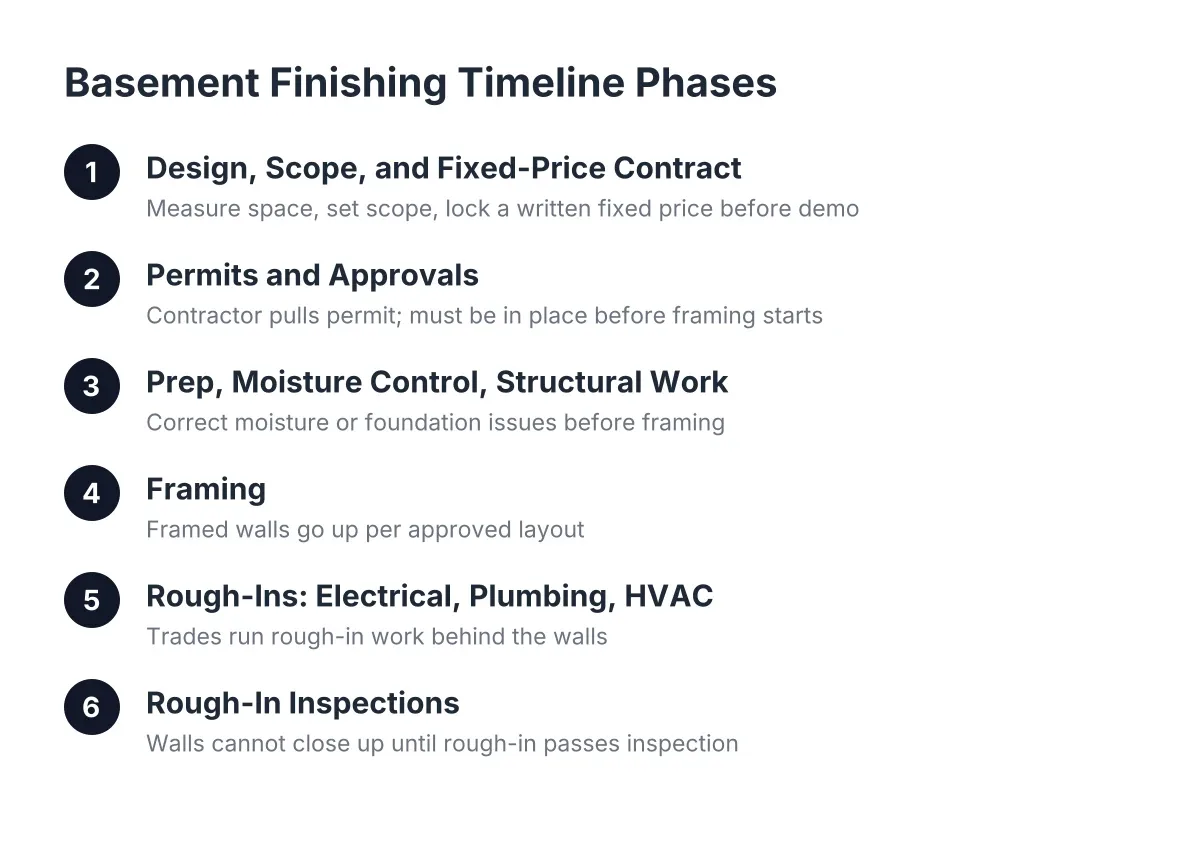
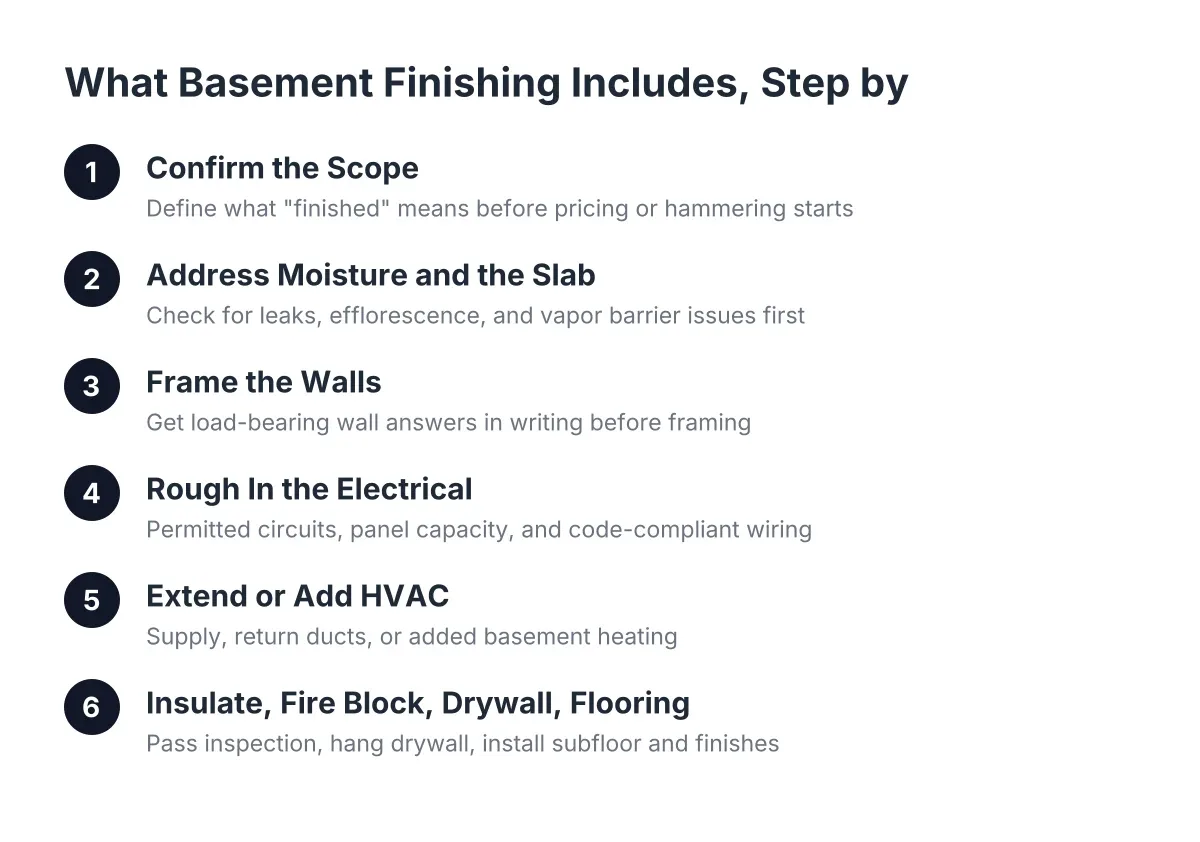
Follow these steps in order. Each one builds on the last, and skipping ahead is where budget surprises start.
Step 1: Confirm the Scope Before Anyone Swings a Hammer
Start by writing down exactly what "finished" means to you. A finished basement can mean drywalled walls, a ceiling, flooring, and lighting. It can also mean a basement bar with plumbing, a basement bathroom, and a rerouted duct run. Those are different projects with different price tags, and the gap between them explains most of the quote spread you see online.
A useful scope list for a St. Louis basement finish looks like this:
- Framing for perimeter walls and any interior partitions
- Electrical rough-in: outlets, switches, lighting circuits, and panel capacity
- HVAC: extending supply and return ducts, or adding basement heating
- Plumbing, if a bathroom or bar sink is in the plan
- Insulation and fire blocking
- Drywall, tape, and finish
- Subfloor and flooring
- Trim, doors, and paint
When you request estimates, ask each basement contractor to break their number out against a list like this. If one quote is ten thousand dollars lower, this list shows you where. Often the cheaper quote skips the subfloor, undersizes the electrical, or leaves HVAC out entirely.
Step 2: Address Moisture and the Slab First
Before framing starts, the concrete needs to be dry and stay dry. Check the slab and foundation walls for active leaks, efflorescence (white mineral staining), and musty smell after heavy rain. St. Louis clay soil holds water, and a finished wall built over a wet foundation is money thrown away.
Moisture control matters below the slab too. According to W. R. Meadows, a vapor barrier placed over the base course under a concrete slab is meant to block moisture transmission from the ground into the concrete above. Older St. Louis homes often lack one, which is why a plywood subfloor with a moisture barrier above the slab becomes important later in Step 7.
However, if you see standing water, wall cracks wider than a coin, or a sump pump that runs constantly, stop here and bring in a professional. No amount of framing and drywall fixes a water problem, and this is the one step where a cheap shortcut costs the most later.
Step 3: Frame the Walls, and Get Load-Bearing Answers in Writing
Framing defines every room, so decisions here lock in your layout. Perimeter walls get framed off the foundation, usually with a gap and insulation strategy suited to concrete. Interior partitions divide the space into the rec room, bathroom, bar area, or bedroom you have planned.
The critical question at this stage: which walls and posts are load-bearing? Steel columns and beams in a basement carry the house above. Any plan that moves, wraps, or removes one needs a load-bearing wall assessment before framing starts, not after. A quote that ignores this question is a quote that grows later.
One more framing note. If your basement came with old framed walls and insulation stuffed against the concrete, plan on tearing it out and starting clean. Building on top of an unknown assembly hides moisture problems and code issues, and most experienced crews refuse to warranty over it.
Step 4: Rough In the Electrical
Electrical rough-in happens after framing and before insulation. This phase includes running circuits for outlets, switches, recessed lighting, smoke detectors, and any dedicated circuits a bar refrigerator or bathroom exhaust fan needs. It also includes confirming your panel has capacity, which is a common surprise in older St. Louis MO homes.
Do I need a permit for basement electrical work? Yes. Electrical work in a basement finish requires a permit in St. Louis and the surrounding municipalities, and the rough-in gets inspected before the walls close up. A contractor who suggests skipping the permit is not saving you money; they are transferring risk to you when you sell the house.
The details matter here too. Non-metallic sheathed cable, the yellow or white Romex most homes use, is not considered best practice for exposed conduit runs, and running it inside EMT is against code in damp or wet locations, per the National Electrical Code (NFPA 70). Where exposed runs are needed, metal conduit done right pulls double duty. According to NEMA, when EMT conduit is rigidly and continuously connected back to the panel, the conduit itself can serve as the grounding path for the circuit. These are the specifics that separate a licensed electrician from a handyman price, and even homeowners doing their own framing and drywall generally hire out this trade.
Step 5: Extend or Add HVAC
A basement without heating and cooling is storage with drywall. This step covers extending supply and return ducts from your existing system, or adding dedicated basement heating if the furnace cannot carry the extra load. Return air placement matters as much as supply; without a return, the basement stays stuffy no matter how much air you push in.
Ductwork also shapes your ceiling. Splitting or rerouting a duct run inside the basement ceiling is how crews build tray ceilings or gain headroom in a hallway without losing coverage. Therefore, get the HVAC plan drawn before drywall pricing, because a duct that has to move after the ceiling closes is a change order waiting to happen.
Like electrical, HVAC is licensed trade work. Even budget-conscious homeowners who handle their own painting and trim should leave this phase to a pro.
Step 6: Insulate, Fire Block, and Pass Inspection
After the electrical and HVAC rough-ins pass inspection, insulation goes in. This phase includes batt insulation in the framed walls plus fire blocking, typically spray foam or solid blocking, in wall and ceiling cavities where code requires it. Fire blocking is easy to miss on a cheap quote and easy for an inspector to catch.
Expect two separate inspections early in the project: the electrical rough-in first, then insulation before drywall. Build those inspection dates into your schedule expectations, because drywall cannot legally start until both pass.
Step 7: Hang Drywall and Install the Subfloor
Drywall is the phase where the basement finally looks like living space. It includes hanging, taping, mudding, sanding, and priming. Ceiling choice happens here too: drywall ceilings look cleaner, while drop ceilings keep plumbing and shutoffs accessible. There is a real trade-off; drywall costs less to look at and more to open up later.
Underfoot, decide between flooring directly on concrete or a plywood subfloor first. A subfloor adds cost per square foot, but it adds warmth, a moisture break, and a better feel under carpet or hardwood. On a St. Louis slab without a vapor barrier below it, the subfloor is usually the smarter spend.
Step 8: Finish Flooring, Trim, and Fixtures
The final phase covers flooring, interior doors, trim, paint, and fixtures. Carpet is the budget-friendly choice for basement bedrooms and media rooms; engineered hardwood or luxury vinyl plank suits bars and open areas. Bathroom tile, vanities, and bar cabinetry land here as well.
Homeowners consistently underestimate trim. Baseboard, door casing, window returns, and any paneling add up to far more linear footage than a typical upstairs room, and it is skilled, slow work. When a quote seems light, trim is often where it got trimmed.
How Basement Finishing Scope Explains the Price Spread
Suppose a buyer closes on a home in Kirkwood with an unfinished 900 square foot basement and $35,000 earmarked from their renovation loan. One estimate covers framing, basic electrical, drywall, and carpet glued to the slab. Another covers the same square footage plus extended ductwork, a plywood subfloor, fire blocking, and permit fees. In that scenario, the second quote runs meaningfully higher, and it is also the one that passes inspection and holds up in five years. Neither contractor is lying; they are pricing different projects.
That is the honest answer behind the cost question. Square footage sets the baseline, but scope moves the number: a basement bathroom adds plumbing rough-in, a bar adds circuits and cabinetry, low panel capacity adds electrical work, and a damp slab adds moisture control. A basement finishing contractor who breaks pricing out by phase gives you something you can actually compare; a single lump-sum number gives you nothing to check.
One caveat on value: a basement finish rarely returns its full cost at resale unless the work is done to a high standard throughout. Finish the basement because you will live in it, then let any added home value be the bonus.
Comparing Basement Finishing Quotes Phase by Phase
Use the eight steps above as your checklist when you talk to basement finishing contractors near me results or referrals from neighbors. For each estimate, confirm the following before you compare totals:
- Does it list framing, electrical, HVAC, insulation, and drywall as separate line items?
- Does it include permits and both rough-in inspections?
- Does it answer the load-bearing question for your specific layout?
- Does it specify subfloor and flooring, or leave "flooring by owner" in fine print?
- Does it name what is excluded, in writing?
As a result, the quotes stop being mystery numbers and start being comparable documents. The cheapest bid is only a bargain if it covers the same eight phases as the expensive one. When it does not, you have found your fifteen-to-eighty-thousand gap, and now you know exactly which pages to flip to when you compare basement remodeling contractors near me against each other in 2026.
If you need basement finishing, STL Basement Finishing can help.
Prefer to talk it through? Call (314) 916-6297 — a quick call is usually the fastest way to get a straight answer for your situation.