The Basement Finishing Process, Step by Step: What Happens and When
Most St. Louis homeowners who want a finished basement have the same two questions: what does basement finishing cost, and what actually happens between the day you sign a contract and the day you carry a couch downstairs. Plenty of articles answer the first question with a calculator. Almost nobody walks you through the second one honestly. That gap is where surprises live, and surprises are where budgets die.
This guide lays out the full sequence, framing, electrical, insulation, drywall, and everything before and after, from a contractor's point of view. Not a national franchise script, and not a generic remodeler's overview where the basement is line item number seven. Just the order things happen, why they happen in that order, and where the permit and inspection checkpoints sit. If you are the kind of homeowner who wants everything done the legal way, this sequence is written for you, because inspections are built into it at exactly the points where they belong.
Why the Order of the Steps Matters More Than the Steps Themselves
Anyone can list the basement finishing steps. Framing, wiring, insulation, drywall, flooring, trim. The list is not the hard part. The hard part is that each step locks in the one before it, and the inspections have to land in between.
For example, once drywall goes up, nobody can see the wiring behind it. That is why the electrical rough-in inspection happens before insulation, and why the insulation inspection happens before drywall. Skip either one and you have a wall that looks finished but cannot be verified without cutting it open. That is exactly the situation that shows up years later when a realtor asks whether the basement finish was permitted and the seller has no paperwork to show.
Therefore, when you read the timeline below, pay attention to the checkpoints as much as the construction. A contractor who describes the project as a smooth run of trades with no mention of inspections is describing a project without a permit. In St. Louis, that is a problem you inherit, not the contractor.
Before Anyone Swings a Hammer: Design, Moisture, and the Permit
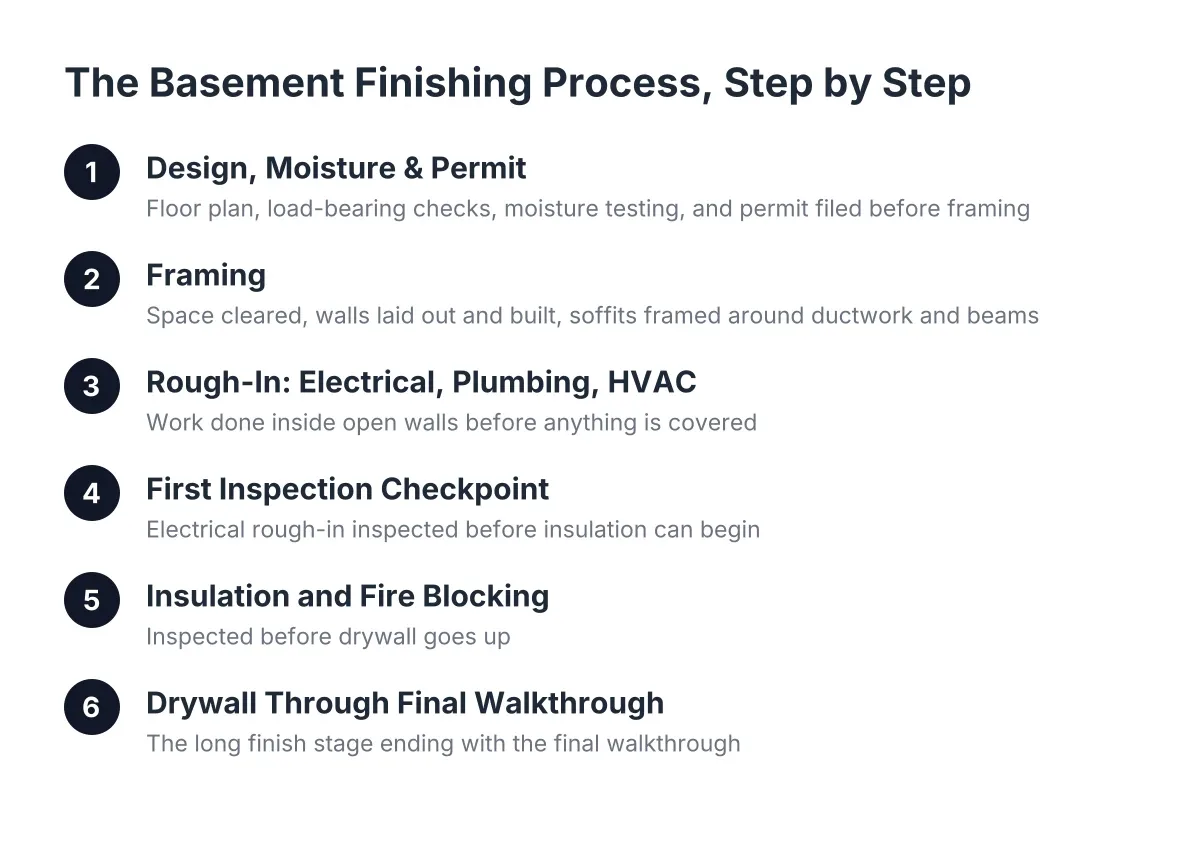
The first phase of a basement finish happens on paper and on your concrete floor, not in the walls. Three things need to be settled before framing starts.
Design Decisions and Their Impact on Basement Finishing Costs
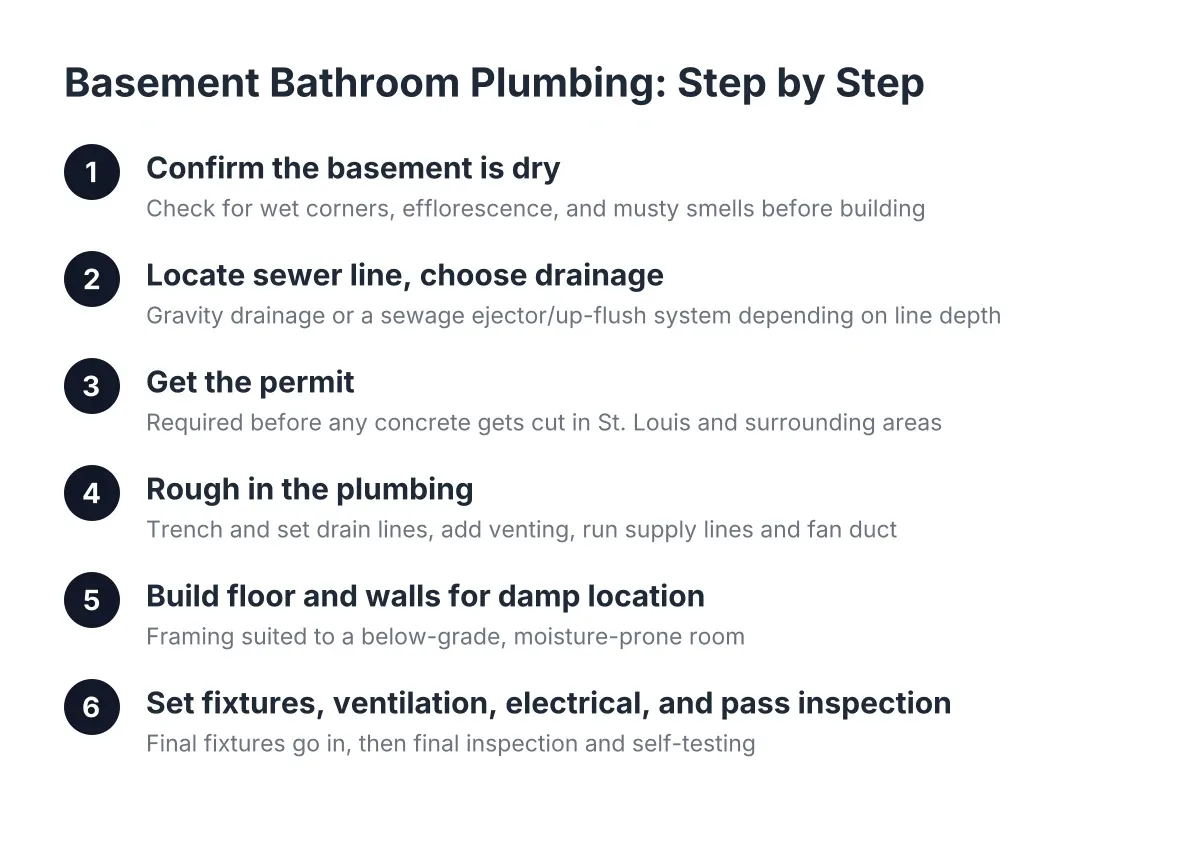
A finished basement is a set of commitments. Where the basement bathroom sits determines where the plumbing rough-in goes, which may mean cutting the slab. Where the basement bar goes determines water lines, drain lines, and dedicated circuits. Whether a wall is load-bearing determines whether it can move at all, which is why a load-bearing wall assessment belongs in the design phase, not the demolition phase.
In addition, this is when finished basement ideas get translated into a floor plan. A media wall, a guest room, a workout corner, a bar with seating for six. Each of those choices changes the electrical plan, the heating plan, and ultimately what the basement finishing cost lands at. Deciding now is cheap. Deciding after drywall is not.
The moisture check that disqualifies some basements
No responsible contractor frames over an active water problem. If your basement takes on water after heavy rain, or the slab shows persistent damp spots, the water issue gets fixed first or the project should not start. Framing, insulation, and carpet over a wet slab is how you buy the same basement twice.
The slab itself matters here too. A vapor barrier placed over the base course under a concrete slab blocks moisture transmission from the ground into the concrete above, according to W. R. Meadows. Older St. Louis homes often predate that practice, which is one reason moisture testing before flooring decisions is worth the small delay it adds.
Do I need a permit to finish my basement in St. Louis?
Yes, finishing a basement in St. Louis generally requires a building permit, and the plumbing and electrical work carry their own review and inspections. Adding a basement bathroom or a wet bar with plumbing does not fly under the radar of the general permit; it is part of what the permit covers. The permit is what triggers the inspections that document the work was done right.
Homeowners worry that pulling a permit invites delay or opens a can of worms. Here is the honest trade-off: yes, the permit adds administrative steps and inspection dates the schedule has to respect. However, the alternative is an unpermitted finish, and unpermitted basement work is a known deal-killer at resale. Buyers' inspectors flag it, lenders question it, and sellers end up either discounting the house or opening walls to get retroactive approval. City and county rules also differ across the St. Louis area, so confirm requirements with your specific municipality rather than a forum thread. A basement-focused contractor should handle the permit application and schedule the inspections, and if a contractor tells you "we don't usually need one," treat that as your answer about how they operate.
Framing: The Week the Basement Gets Its Shape
Framing is the first phase that looks like progress. Before the first stud goes up, the space gets fully cleared. Storage bins, old furniture, and scrap all come out, because framing around clutter produces crooked walls and skipped steps.
Next, the crew lays out walls on the slab, fastens bottom plates to the concrete, and builds the stud walls that define each room. Around ductwork and beams, they frame soffits and chases so the mechanical guts of the house disappear cleanly instead of getting boxed in as afterthoughts. Any load-bearing wall gets treated with the respect it demands; posts and beams that carry the house do not move without engineered framing to replace them.
This is also where subfloor decisions get built in. On many St. Louis slabs, a plywood subfloor over a moisture barrier or sleeper system makes the finished floor warmer and drier than flooring glued straight to concrete. It matters most if you want carpet or hardwood rather than vinyl plank. The subfloor adds material and labor to the basement finishing cost, but it changes how the room feels underfoot in January, which is when you will notice.
Framing on a typical single-family basement is measured in days, not months, assuming the design was settled beforehand. Changes during framing are still cheap. This is the last phase where that is true.
Rough-In: Electrical, Plumbing, and HVAC Inside the Open Walls
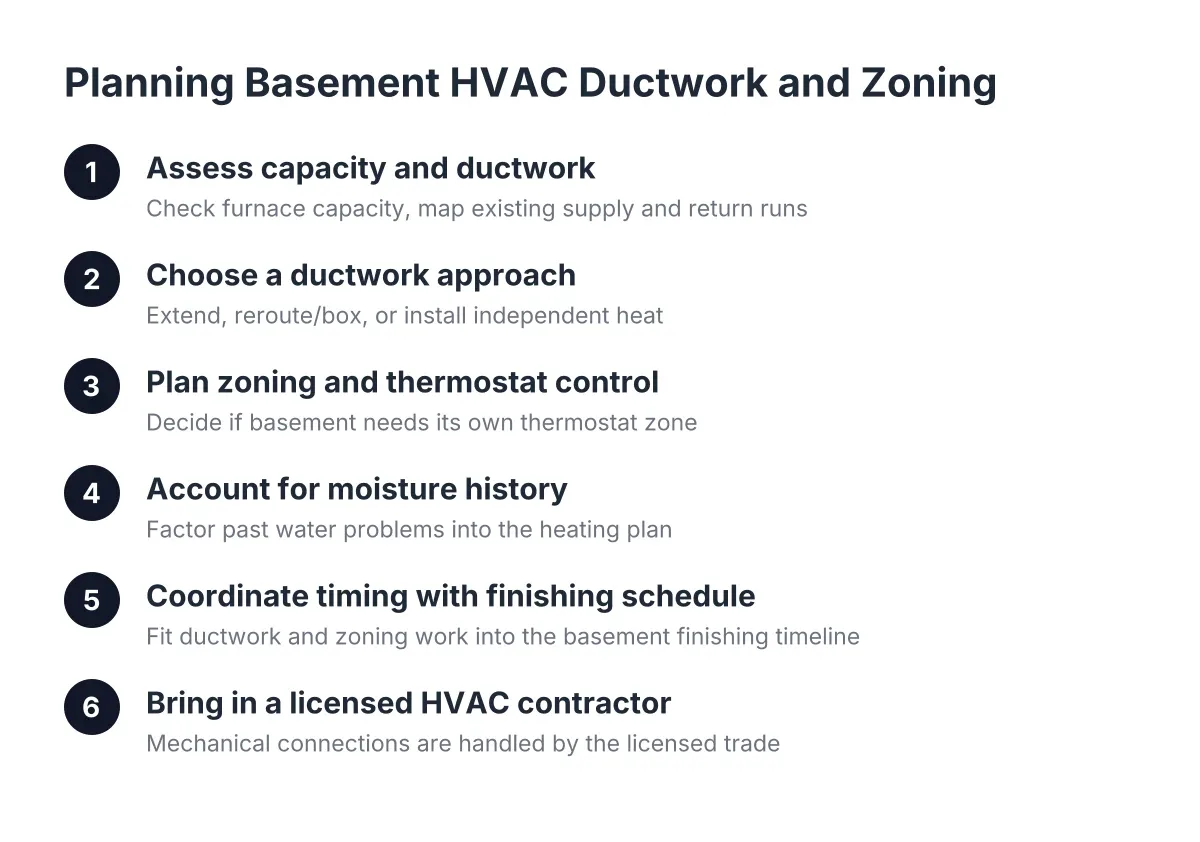
With walls framed and open, the trades move in. Electricians run circuits for outlets, lighting, the media wall, and any dedicated circuits for a bar fridge or bathroom heater. Plumbers rough in supply and drain lines for the basement bathroom and bar sink. The HVAC work extends heating into the space, whether by tying into existing ductwork or adding a separate heat source, so the basement holds a comfortable temperature year-round instead of feeling like a basement.
Two points deserve emphasis for anyone weighing basement finishing DIY against hiring it out. First, electrical and HVAC are the phases where doing it yourself goes wrong in ways you cannot see. These trades carry their own licensing requirements for good reason, and even homeowners who frame and drywall their own basements typically hire out the wiring and heating. Second, basement wiring has code details that surprise DIYers. Non-metallic sheathed cable, the Romex most people picture, is not considered best practice for exposed conduit runs, and running it inside EMT is against code in damp or wet locations, per the National Electrical Code (NFPA 70). Details like that are exactly what the rough-in inspection exists to catch.
The first inspection checkpoint
Once rough-in is complete, the electrical rough-in inspection happens before anything covers the walls. The inspector verifies the wiring while it is still visible. Plumbing rough-in gets its own review as well. Nothing about this step is adversarial; a clean rough-in passes in minutes, and the sign-off becomes part of the paper trail that protects you at resale. For the permit-anxious homeowner, this is the moment the project becomes documented rather than assumed.
Insulation and Fire Blocking: The Step Homeowners Forget Exists
After rough-in passes, insulation goes into the framed walls. In a basement, this phase includes something most homeowners have never heard of: fire blocking. Building codes require that the hidden gaps in wall and ceiling cavities be sealed, often with fire-rated spray foam or solid blocking, so a fire cannot travel unseen through the framing. It is invisible in the finished room and non-negotiable in the inspection.
Then comes the second checkpoint, the insulation inspection. The inspector confirms insulation coverage and fire blocking before drywall closes everything in. Two inspections before a single sheet of drywall goes up; that is the rhythm of a permitted basement finish, and it is why the sequence cannot be shuffled to save a week.
One more decision point belongs here. Suppose you bought a house where a previous owner framed and insulated part of the basement decades ago, with batts stuffed directly against the concrete. It is tempting to build on top of that work. In most cases, the better call is tearing it out and starting clean, because you cannot verify what is behind it, whether it was ever inspected, or what moisture has done inside the assembly since. Paying to demo old work stings, but it is cheaper than finishing over a hidden problem.
Drywall Through Final Walkthrough: The Long Finish
Drywall is when the basement stops looking like a construction site. Hanging goes fast; the taping, mudding, and sanding that follow are what take the time, because each coat of joint compound has to dry before the next one goes on. This stretch of the basement finishing process tests homeowner patience more than any other, since the room looks nearly done for days while the compound cures.
After paint, the finish phases run in sequence:
- Flooring goes down, carpet, hardwood over the plywood subfloor, or vinyl plank, depending on the moisture picture and how the room will be used.
- The basement bathroom gets fixtures, tile, and ventilation.
- The basement bar gets cabinetry, countertop, sink, and its dedicated circuits energized.
- Doors, trim, and hardware finish the details.
- Final electrical and plumbing inspections close out the permit.
A word about trim, because it catches people off guard. A finished basement often carries more trim work than any other room in the house. Baseboard runs the full perimeter, every soffit and beam wrap gets cased, stair openings get finished, and access panels get framed out. If your quote's trim line looks bigger than expected, this is why, not padding.
The project ends with a final walkthrough and the closing inspections. The inspector signs off, the permit gets closed, and you hold documentation that the finish is legal. When a future buyer's agent asks whether the basement was permitted, your answer is a folder, not a shrug.
How Long Does It Take to Finish a Basement?
A basement finishing timeline depends on scope, inspection scheduling, and how many trades the design requires, so honest contractors give ranges tied to your specific plan rather than a universal number. A straightforward open rec room moves faster than a project with a bathroom, a bar, and slab cuts for new drains. The sequence, however, is fixed: design and permit, framing, rough-in, first inspection, insulation, second inspection, drywall, finishes, final inspection.
What stretches timelines is rarely the construction itself. It is decisions made late, water problems discovered mid-project, and change orders after drywall. As a result, the single best thing a homeowner can do for the schedule is finalize the design, including the bar layout and bathroom fixtures, before framing starts.
What the Process Tells You About Basement Finishing Cost
The sequence above is also a map of where the money goes. Instead of a basement finishing cost calculator spitting out one number, think in terms of a cost breakdown that follows the phases: framing and subfloor, electrical, plumbing, HVAC, insulation, drywall, flooring, bathroom, bar, and trim. Each phase you add or upgrade moves the total, and each one you can point to on a quote is one less surprise.
The biggest cost drivers, in rough order of impact:
- Plumbing scope. A basement bathroom or wet bar adds rough-in work, fixtures, and sometimes slab cutting. It is the largest single swing in most projects.
- Square footage being finished. More area means more framing, drywall, flooring, and trim, which is why contractors talk in cost per square foot.
- Subfloor and flooring choice. A plywood subfloor plus hardwood costs more than carpet pad on concrete, and the comfort difference is real.
- Electrical complexity. Recessed lighting throughout, a media wall, and dedicated bar circuits cost more than basic outlets and two ceiling fixtures.
- Existing conditions. Moisture remediation, old unpermitted framing that needs demo, or a load-bearing wall change all add work before the finish work starts.
Notice what is not on that list: the permit. Permit and inspection costs are a small slice of any basement project, and they buy the documentation that protects the largest asset most families own. Cutting that corner to trim the basement finishing cost is trading a small line item for a large resale problem.
One honest caveat on value. A basement finish is a lifestyle investment first and a resale play second; finished basements rarely return their full cost at sale unless the renovation is done well and done completely. If your main goal is resale value, weigh that with your realtor before committing. If your goal is a bar where friends actually gather and a bathroom nobody has to climb stairs for, the math looks different.
A Realistic Walkthrough, Start to Finish
To make this concrete, say a homeowner in south St. Louis County wants to finish 900 square feet of unfinished basement: an open entertainment area with a bar, a half bathroom, and carpet over a plywood subfloor, on a budget in the range many local families plan for, roughly the teens to low thirties in thousands of dollars. Those figures are illustrative, not a quote; the actual number depends on the plan and the conditions in that specific basement.
In that scenario, the project runs like this. Week one is not construction at all; it is design decisions, a moisture check after a rainy stretch, a load-bearing wall assessment near the stairs, and the permit application. Framing and the subfloor go in next, followed by electrical, plumbing, and heating rough-in. The electrical rough-in inspection is scheduled, passes, and insulation with fire blocking goes in, followed by the insulation inspection. Drywall, paint, carpet, the bathroom, the bar build, and a heavier-than-expected trim package follow in sequence. Final inspections close the permit, and the homeowner files the paperwork where the future sale documents will live.
Nothing in that sequence is exotic. What makes it low-stress is that every checkpoint was planned from day one, so no inspection ever arrives as a surprise and no wall ever has to be reopened. That is the whole argument of this guide: the basement finishing steps are not complicated, but the order and the checkpoints are non-negotiable, and a contractor who builds the schedule around them is showing you how they handle everything else.
If you need basement finishing, STL Basement Finishing can help.
Prefer to talk it through? Call (314) 916-6297 — a quick call is usually the fastest way to get a straight answer for your situation.